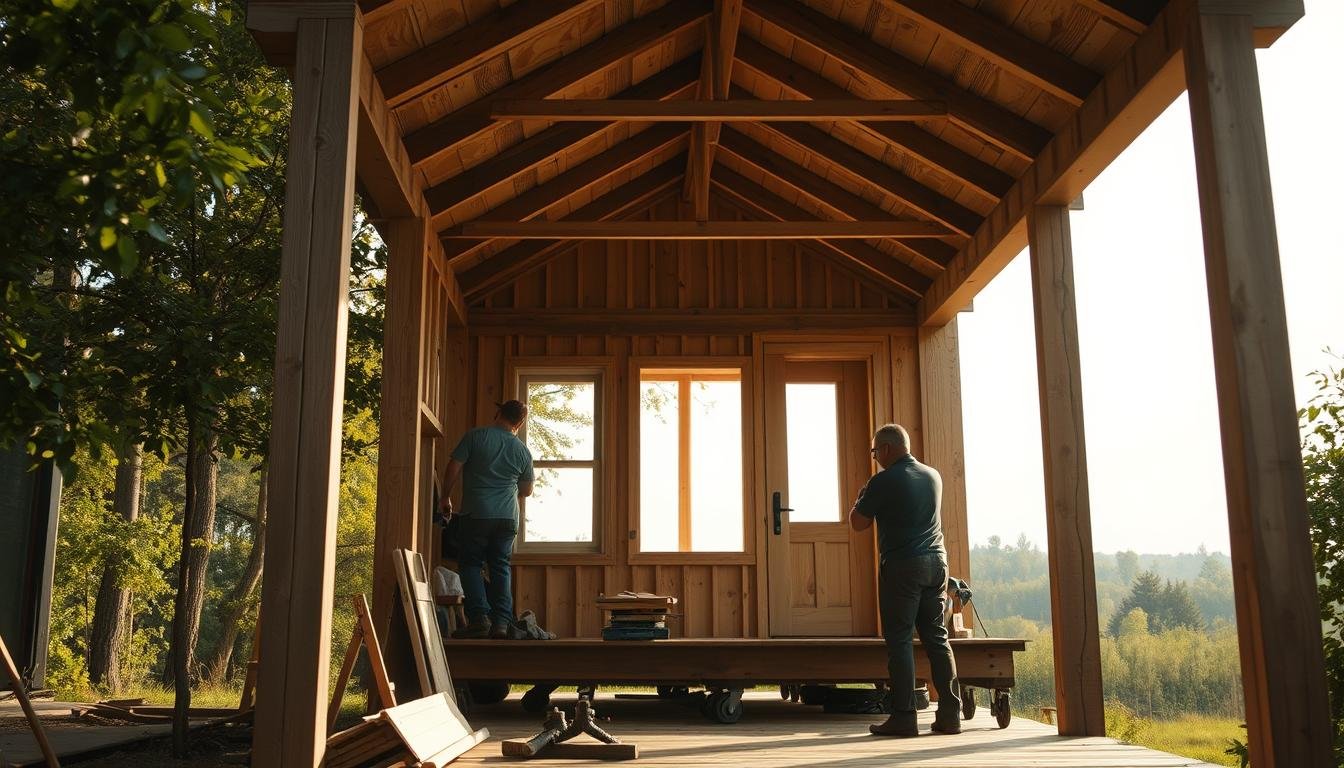
Tiny house construction can demand nearly 1,660 hours for a full build, with costs ranging from about $34,000 to $50,000 in 2024.
This opening fact shows how easily time and budget slip when people underestimate the work. The guide helps readers spot where schedules and estimates falter.
The difference between a mobile dwelling and a traditional house is heavy on systems and sequencing. Mistakes often stem from poor planning, mismatched expectations, or skipped quality checks.
Readers will follow practical steps used by pros to avoid common pitfalls. The roadmap covers time management, realistic budgeting, code paths within the United States, and sensible sequencing.
Anyone building nights and weekends should plan for a long process and steady momentum. Early choices about scope and finishes drive the cost range noted above.
For a compact primer on zoning and site issues, see a related checklist at things to consider before building.
Key Takeaways
- Expect 1,090–1,660 build hours; schedule conservatively.
- Plan budgets between $34k and $50k depending on scope.
- Treat planning, sequencing, and checks as non-negotiable.
- Design for mobility and systems density early in the process.
- Weekend builders must protect momentum to avoid long delays.
- This guide focuses on U.S. standards and common code paths.
Overview: The Biggest Tiny House Construction Pitfalls Builders Face Today
What seems like a minor oversight at the start can block parking, inspections, or resale later. Early choices affect the whole build process and the practical side of living in a compact dwelling.
The most common failures trace back to skipping the Five Pillars: Time, Plans, Place, Skills, and Money. Weekend DIY projects often stretch to 18–24 months, which saps momentum and raises costs.
- Time gaps force rework; steady blocks of work keep progress and morale.
- Poor or vague plans cause fit issues and systems conflicts during framing and finishing.
- Ignoring zoning, parking rules, and certification (NOAH/RVIA) can limit where the tiny home may legally live or sell.
- Underestimating budget for materials, tools, and consumables leads to compromises that compound.
- A bad or temporary work place increases weather risk and material loss, slowing the build.
Each following section breaks these problems into clear steps and actions. Readers will get practical fixes to reduce delays, protect money, and improve long‑term living outcomes.
Skipping The Five Pillars Of Planning Before The First Cut
Good plans stop small mistakes from becoming expensive, schedule-crushing disasters. Before any framing begins, builders must lock the Five Pillars: Time, Plans, Place, Skills, and Money. Each pillar fixes a critical risk that otherwise forces rework or adds hidden costs.
Time, Plans, Place, Skills, And Money: The Non‑Negotiables
Time is the master constraint. Professionals log 1,090–1,660 hours; full‑time builds take 6–10 months, while weekend projects often stretch 18–24 months. Calendars and milestones keep people focused and protect momentum.
Plans are the foundation. Start with complete plan sets and convert design notes into exact cuts, fasteners, and steps. Use a formal plan to reduce onsite guesswork and waste.
The right place to build matters. Aim for 1,000–2,000 sq ft of sheltered workspace to keep materials dry and teams safe. A clean site speeds work and cuts damage.
Skills grow with practice. Free plan sets and tutorials bridge gaps, but know when to hire a pro for structural, electrical, or plumbing work.
Money equals steady progress. A starter fund of $15,000 plus $1,000/month for 36 months lands near $51,000; add rent and delays and real cost can approach $87,000. Plan cash flow and a contingency.
Translating Vision Into Buildable Plans And Steps
- Map lifestyle needs to layout, weight, and tow limits so design matches use.
- Break the plan into linked steps: ordering, framing, rough‑in, inspections, and finish.
- Create checklists tying materials to each step and flag inspection points to avoid surprises.
Pro tip: Turn large tasks into short, scheduled blocks and protect buffer time and money to absorb changes without compromising quality.
For full build guidance and example plan sets, consult a trusted resource like Tumbleweed’s build guide.
Choosing The Wrong Trailer Or Foundation For The Build
The right base makes subfloor framing simple; the wrong one adds hours and frustration. Start by matching the foundation and trailer to the planned layout and finished weight. Early choices affect headroom, towability, and where the project can legally travel and park.
Trailer Types: Utility, Deck‑Over, And Custom Frames
Builders choose between utility, deck‑over, and custom tiny house trailers. Each type changes deck height and wheel well placement, which affects lofts and cabinetry.
- Utility trailers are simple but often need beefed-up decks for wall loads.
- Deck‑over gives lower center height yet can raise the interior floor and cut loft space.
- Custom trailers (for example, a low‑rider frame extended to 8.5 feet with square wheel wells) let builders avoid a wood deck and tailor clearances.
Axle Ratings, Deck Height, And Subfloor Basics
Match axle ratings to the finished weight. Underrated axles create unsafe towing and legal issues. A common spec is twin 7,200‑lb axles for heavier builds.
Use a flat, true deck to reduce shimming and make walls square. For the subfloor, 3/4″ T&G OSB fastened with construction adhesive and bolts to the trailer gives a rigid floor assembly.
Cold‑Climate Floor Insulation And Flashing Details
In cold climates, install EPS between steel members and use spray foam to seal gaps. Galvanized flashing under the trailer protects insulation from road spray and vibration.
“Protect the insulation and tie the floor to the frame; details save hours and money later.”
Plan building materials early so framing, insulation, and sheathing align with the chosen foundation and design.
Underestimating Time And Project Management
Underestimating the hours a build needs is the fastest way to stretch a project into months of delay. A clear view of hours, milestones, and dependencies keeps the work steady and protects momentum.

Realistic Hour Ranges: From Plans To Fit‑And‑Finish
Estimate by phase: Tumbleweed numbers help. Creating plans takes ~100 hours. Buying materials runs 80–200 hours. Trailer prep adds 10–60 hours. Actual building is 830–1,300 hours. Totals land around 1,090–1,660 hours.
Full‑time builders finish in 6–10 months. Part‑time people often need 18–24 months or longer. These ranges show why a written plan matters.
- Break the project into phases with hours to counter optimism bias and block calendars for each step.
- Remember fit‑and‑finish often doubles expected time because trim, paint, and corrections take patience and sequence.
- Use task lists and weekly sprints to order materials early and avoid stockouts that stop the process.
- Log time by phase to spot bottlenecks and shift resources before delays cascade.
- Schedule pauses for squareness checks, fastener reviews, and moisture protection before closing assemblies.
“A written plan prevents burnout and keeps energy focused on priority tasks.”
Ignoring Budget Reality And Material Cost Escalation
Small price shifts for lumber or windows can cascade into major budget stress. Builders who treat cost planning as an afterthought often face late changes that slow the process and raise long‑term money needs.
Tumbleweed’s 2024 estimate for a 120 sq ft build sits near $50,000 including tools and materials. Other DIY estimates fall in the mid‑$34k range for self‑managed labor and direct purchase.
Use a starter fund ($15k) plus a $1k/month reserve to model cash flow. Over 36 months that equals about $51k. Add $1k/month in housing or storage and the true cost can approach $87k.
Where To Save Versus Where To Spend
- Save: phased cabinetry, used tools, simple interior finishes.
- Spend: trailer, quality windows/doors, roof, and insulation for safety and longevity.
Practical Steps: Lock key building materials early and buy from reliable suppliers like 84 Lumber, L&W Supply, and Metal Roofing Source to manage lead times.
“Track every purchase and negotiate bulk delivery to keep the project on budget.”
- Prioritize high‑return buys (Owens Corning higher R‑value when climate warrants).
- Record expenses to avoid late compromises and to measure the true cost of time, rent, and missed income.
Not Securing A Proper Place To Build And Store Materials
A cramped, wet, or inaccessible workspace forces extra steps that sap time and cash.

Tumbleweed recommends about 2,000 sq ft of usable space, with 1,000 sq ft as a minimum. A stable place reduces lost time from weather, neighbor issues, and mid‑build moves.
Secure storage keeps wood, insulation, and plywood dry and usable. That protection avoids waste and reorders, which cost both money and time.
“Protect the worksite and materials to prevent small delays from becoming big setbacks.”
Plan power, lighting, and clear staging areas so each step runs cleanly. Indoor or covered space helps finishes dry faster and keeps the schedule steady in bad weather.
- Clear and mark the build space before deliveries.
- Arrange secure, covered storage for bulk materials.
- Confirm site access, parking rules, and a backup location.
| Requirement | Recommended | Why It Matters |
|---|---|---|
| Work Area | 1,000–2,000 sq ft | Room for framing, staging, and safe movement |
| Material Storage | Covered, elevated racks | Prevents moisture, warping, and theft |
| Utilities | Power and lighting on site | Keeps tasks on schedule and improves safety |
| Site Access | Clear drive and parking plan | Simplifies delivery of trailers and heavy panels |
Tiny House Contruction Plans And Design Mistakes
Translating daily routines into a compact layout is where most projects win or lose. Early planning must match occupants, climate, and legal limits so the final result supports comfortable living. Small choices about stairs, windows, and appliance placement change how usable each square foot feels.
Layout, Loft Access, And Space Efficiency Missteps
Design the layout from daily use first. Map who sleeps where, where cooking and storage happen, and the circulation path between zones.
Loft access must be safe and usable. Stairs that double as storage and short landings beat narrow ladders for daily living.
Pro tip: Consider mobile ladders only when loft loads are minimal and an alternative exists for frequent use.
Weight, Width, Height, And Towability Constraints
Keep legal limits in mind. Some jurisdictions allow wider builds with permits — for example, 10.5 feet may need special approval in Yukon.
Account for cladding and roof assemblies; final height can exceed initial plans by several inches. Balance weight across axles by placing appliances and dense finishes low and near the trailer centerline.
- Translate lifestyle into plans: model appliances, storage, and ventilation early.
- Coordinate walls and openings: match wall thickness to rough openings to avoid trim and fit problems.
- Limit mass aloft: minimize heavy materials in the loft and brace loft supports to axle lines.
“Good modeling at the design stage prevents fit and towability surprises.”
| Design Topic | Common Mistake | Quick Fix |
|---|---|---|
| Loft Access | Steep ladders only | Use compact stairs with built-in storage |
| Width/Height | Not accounting for cladding | Check final measurements in feet before permits |
| Weight Distribution | Concentrated heavy items aft | Place appliances over or between axles |
Framing Errors That Compromise Strength And Square
A single bad framing step can force costly rework and weaken the whole structure. Correct framing sets the foundation for durable walls and reliable finishes.
Start With Consistent Stud Spacing. Use 16″ or 24″ on‑center spacing to match insulation batts and support plywood edges. Consistent spacing prevents gaps and thermal leaks.
Studs, Headers, And Double Top Plates
Install king studs at each door and window and size headers to the opening so loads transfer safely. Add a double top plate to tie intersecting walls and stiffen the assembly for travel and wind loads.
Verify squareness after raising every wall and brace temporarily. Missing blocking or over‑boring studs will cause fastener misses for plywood or interior panels.
- Check wood for straightness and moisture content to avoid twist and future wall waves.
- Plan penetrations so pipes and wiring don’t weaken critical studs.
- Follow fastening schedules and stagger sheathing joints to build a stiff diaphragm for road travel.
“Bracing and attention to details at the framing step save hours later and protect structural integrity.”
Roof And Loft Mistakes That Invite Leaks Or Sag
A weak roof system quickly reveals itself through cracked ceilings and a damp loft. Builders should size members and detail connections to resist snow, wind, and road vibration.
Rafter Sizing, Hangers, Venting, And Metal Roofing Essentials
Rafters: Use span calculators and choose rafter sizes for local snow loads. In heavy snow areas, 2×10 rafters are a common choice to limit deflection and long‑term sag.
Connections: Fit rafter hangers and hurricane ties to resist uplift and vibration. Proper metal connectors reduce fastener fatigue during travel.
Sheathing & Flashing: Sheath with 1/2″ plywood, add quality underlayment and furring strips, and detail flashing to move water away from seams and penetrations.
- Plan soffit intake and ridge exhaust to prevent condensation and rot.
- Install ice‑and‑water shield and a continuous ridge cap for a sealed top.
- Avoid compressing insulation at rafters; that preserves R‑value near the loft.
“Sequence roofing work to keep finished panels free of foot traffic and seal damage.”
Load Planning: Size loft joists and hangers for expected occupancy loads so deflection does not crack finishes. Follow clear steps during installation and check each fastener.
For detailed waterproofing steps and sequences, see waterproofing steps that align with durable building and construction practice.
Windows And Doors: Poor Openings, Flashing, And Sealing
A miscut opening or poor flashing will undo weeks of careful wall work. Accurate rough openings and a predictable flashing sequence protect the build from leaks and drafts.

Correct Rough Openings, Shims, And Layered Flashing
Order units to the rough opening and dry‑fit each window and door before fastening into the walls. Confirm the unit sits square in the opening and check reveals around the frame.
Use shims primarily at the bottom sill to support the frame and limit shear stress during travel. Avoid shim stacking at the head, which stresses glass and fasteners.
- Flashing sequence: sill first, then jambs, then head; integrate flashing with house wrap so water routes out.
- Leave the bottom of the flashing untaped as a drainage path to prevent trapped water.
- Use compatible silicone sealant and flashing tape on flanges to preserve adhesion over time.
- Do not trim openings after installation; cutting weakens plywood edges and reduces weather resistance.
Test each install with a controlled spray to verify no leaks and to confirm door latches and reveals operate smoothly.
Electrical And Plumbing Missteps That Risk Safety
A single wrong gauge or an untested PEX run can turn a finish phase into an emergency. Proper planning for circuits and water runs prevents trips, leaks, and costly repairs.
Panel Sizing, Wire Gauges, Circuit Planning, And Protection Plates
Size the main panel for present loads and a modest future upgrade; a 100‑amp panel is common for DIY builds. Map circuits so heavy loads are balanced across phases and breakers.
Use the right wire: 14/2 for lighting and 12‑gauge for receptacles. Install metal protection plates where wiring passes near stud edges to avoid nails or screws during finish work.
When shore power is limited, calculate available watts. A 15A supply gives about 1,800W theoretical and ~1,500W practical. Plan which appliances run together to avoid nuisance trips.
“Label every breaker clearly and photograph the panel layout for troubleshooting later.”
PEX Runs, Pressure Tests, And Fixture Placement
Route PEX lines neatly and use sleeves through framing to protect tubing from abrasion. Fit clamps and approved fittings at each joint and place shutoffs where they are easy to reach.
Pressure‑test plumbing before closing walls to catch leaks early. Test results save hours and prevent hidden water damage to finishes or insulation.
Locate bathroom fixtures with ergonomics in mind; check clearances for a toilet and access to the water heater and valves. Plan steps for servicing appliances so maintenance does not require demolition.
- Tools: multimeter, crimp tools for PEX, and GFCI/AFCI protection devices are essential.
- Label circuits and photograph runs for quick diagnosis later.
- Protect exposed lines and allow service access to valves and the water heater.
Final step: hire or consult a licensed electrician or plumber for code checks and final sign‑offs when required. Safety and inspections are not optional.
Insulation, Air Sealing, And Moisture Control Errors
Small gaps at sheathing joints can cut insulation performance in half. Builders must think about layers, vapor control, and a clear drainage path before closing walls.

R‑Values By Assembly And Climate Considerations
Layered assemblies balance thickness, weight, and condensation risk. A typical cold‑climate wall uses mineral wool batts (R‑14), exterior graphite EPS (R‑5), and an interior foam/vapor control (R‑6.5) to reach roughly R‑27.5.
Ceilings aim higher: 8″ of closed‑cell foam at ~R‑6/inch gives about R‑48. Floors inside the trailer frame often use 7.5″ EPS to hit ~R‑37.5 and protect plumbing from cold.
House Wrap, Tapes, And Vapor Management
Meticulous air sealing matters at sheathing joints, penetrations, and around electrical boxes. Follow shingle‑style overlaps and use compatible flashing tape so water moves out of the assembly.
“Misplaced vapor retarders trap moisture; choose the right retarder for the climate.”
- Balance R‑value and condensation risk by climate zone and wall depth.
- Use continuous exterior insulation plus batt fill for stable thermal performance.
- Air‑seal seams and test with a blower‑door or smoke pencil when possible.
| Assembly | Typical Materials | Target R‑Value |
|---|---|---|
| Wall | Mineral wool + Graphite EPS + Interior foam | ~R‑27.5 |
| Ceiling | Closed‑cell spray foam (8″) | ~R‑48 |
| Floor | 7.5″ EPS between trailer members | ~R‑37.5 |
- Seal sheathing joints with tape and compatible sealant.
- Flash penetrations and test for leaks before installing plywood or finish paneling.
- Document assembly choices for inspection and long‑term maintenance of the house.
Poor Material Choices For Climate, Weight, And Durability
Material choices that ignore climate or weight limits create performance problems and towing headaches.
Match materials to the climate and the build’s weight budget. In wet, coastal, or snowy regions, choose weather‑resistant cladding and glazing so the assembly lasts and stays light enough for safe towing.
Engineered siding and metal roofing offer long service life and low maintenance for many climates. Western red cedar is a good wood option where weight and moisture resistance matter.
For lower walls or accent runs, galvanized corrugated metal resists road spray and abrasion. For sheathing, pick plywood grades and thicknesses rated for vibration and travel loads to avoid delamination.
Upgrade glazing in cold regions with triple‑pane windows to reduce heat loss; tradeoffs include added weight and cost that must fit the trailer rating.
“Use corrosion‑resistant fasteners and flashings where salt or road spray is present.”
- Specify materials that match the overall design and interior finish goals.
- Choose fasteners, flashing, and coatings for the exposure expected.
- Verify availability and lead times early so selections do not delay the building process.
Overloading The Trailer And Unbalanced Weight Distribution
Loads placed without a plan turn a rolling frame into a safety hazard and an expensive repair.
Axles must exceed predicted finished weight. For heavier builds many pros specify dual 7,200‑lb axles so the trailer carries load safely and meets towing expectations.
Balance mass fore‑and‑aft and side‑to‑side. Place dense items — batteries, appliances, and water tanks — near axle centers to reduce pitch and improve handling. Unequal side loading can twist the frame and crack finishes or floor tile.
Plan for moving water. Fresh and gray water shift during travel; tank placement, internal baffles, and low mounting help limit shifting loads.
- Estimate weight honestly; exceeding axle ratings risks structural damage and unsafe towing.
- Confirm tongue weight percentages to avoid sway and hitch overload.
- Weigh by corner or axle during construction to validate placement and adjust before finishes.
- Consider low‑rider frames to gain interior headroom while keeping overall height within code feet limits.
- Overloading speeds wear on tires, brakes, and the trailer frame, shortening long‑term durability.

| Issue | Recommended Action | Why It Matters |
|---|---|---|
| Axle Rating | Choose axles > finished weight (example: dual 7,200‑lb) | Prevents overload, unsafe towing, and frame stress |
| Item Placement | Locate heavy systems near axle centerline | Reduces pitch and improves tow stability |
| Water Tanks | Use low mounts and baffles | Limits shifting mass during motion |
Rushing Fit‑And‑Finish And Skipping Quality Checks
Rushing final touches often exposes small flaws that loom large in a compact build.
Finish work needs patience. Misaligned trim, uneven paint, and gaps become obvious in a small house and are costly to fix.
Sanding, caulking, and priming in clear steps prevents visible flaws. Allow proper cure times between coats so paint and sealants bond well.
Adjust cabinets, drawer slides, and door reveals until operation is smooth and even. Small movements now save callbacks later.
- Seal wet areas carefully—backslash and tile grout edges protect nearby wood and plywood from moisture.
- Install stairs with storage precisely; check treads for level and connections for rigidity.
- Test systems at the end with electrical load checks, plumbing pressure tests, and HVAC function runs.
“A systematic punchlist and final tests catch issues before move‑in.”
Do a walk‑through and document each step. A short punchlist and careful final checks elevate the building and the long‑term feel of the home.
Overlooking Legal, Zoning, And Certification Pathways
A missed permit or parking rule can make an otherwise solid design unusable at its chosen place. Builders should confirm local zoning and permit rules early so the design matches allowed uses.
Permits, Parking Rules, And Utility Hookups
Check city or county zoning for tiny homes on wheels versus those on a permanent foundation. Rules vary; some counties allow a permanent foundation only with a building permit.
Permits may be required for foundations, electrical, and plumbing hookups. These set the inspection points that protect occupants and resale value.
Parking rules dictate whether full‑time occupancy is allowed. That impacts insurance and long‑term plans. Confirm local RV park and neighborhood restrictions before finalizing site choice.
Utility needs—water, power, and sewer—drive site layout and service costs. Plan hookup locations early so the plumbing and electrical runs follow the approved process.
NOAH And RVIA: When Certification Makes Sense
NOAH demonstrates build quality to buyers and some inspectors. It helps when a builder wants a clear safety record for resale.
RVIA classifies a unit as an RV and can ease placement in parks and simplify transport rules. This path may suit those building tiny homes on wheels who plan frequent moves.
Choose a certification that matches intended use, resale, and financing options. Keep permits, photos, and labeled plans to streamline inspections and certification reviews.
| Topic | What To Verify | Why It Matters |
|---|---|---|
| Zoning & Permits | Wheels vs. foundation; required permits | Determines legal site placement and inspection triggers |
| Parking & Occupancy | Full‑time rules, park approvals | Impacts insurance, livability, and long‑term options |
| Certifications | NOAH or RVIA based on intended use | Supports resale, financing, and park access |
| Utilities | Water, power, sewer hookup plans | Affects design, costs, and permit sequencing |
“Confirm zoning and cert paths early to avoid costly redesigns during final inspections.”
For a state‑by‑state code overview, consult a trusted state code guide when planning building tiny home projects.
Conclusion
Closing the build with steady checks prevents small faults from becoming lasting problems. A clear end to the process comes from following deliberate steps and keeping priorities aligned.
Success starts with the Five Pillars: Time, Plans, Place, Skills, and Money. Choosing the correct trailer or foundation and insulating floors for cold climates sets a strong base for a durable tiny house.
Careful framing, roofing, and layered flashing stop moisture and structural issues. Properly sized electrical and plumbing work, plus pressure and load testing, protect safety and function.
Track costs honestly and confirm zoning, NOAH/RVIA paths early. When builders follow the process calmly from start to end, the finished tiny home fits real‑world living and holds value.
FAQ
What are the most common mistakes builders make when starting a tiny house project?
The most frequent errors include skipping detailed planning, choosing the wrong trailer or foundation, underestimating time and budget, and ignoring weight and towability limits. Poor framing, inadequate insulation, and incorrect roof or flashing details also lead to long‑term problems.
How should someone plan before making the first cuts?
Builders should confirm five pillars: time, plans, place, skills, and money. Develop buildable plans with materials lists, a realistic schedule, a secure workspace, and a budget that accounts for material escalation and unexpected costs.
How do you choose the right trailer or foundation?
Match trailer type and axle ratings to the finished weight and intended use. Consider deck height for headroom, subfloor framing for load distribution, and corrosion resistance. For stationary builds, confirm local foundation rules and frost protection details.
How much time does a complete build usually take?
Time varies widely by skill and scope. A full DIY build often ranges from several hundred to over a thousand hours. Allocate extra time for permitting, finish work, and unexpected repairs. Break the project into phases to track progress.
What budget items are most often underestimated?
Labor value, specialty tools, shipping, fasteners, insulation, windows, doors, and finishing materials are commonly underbudgeted. Include contingency for upgrades, permit fees, and additional plumbing or electrical components.
Where is it acceptable to cut costs and where should one invest more?
Save on non‑structural finishes and by sourcing reclaimed materials when they meet standards. Invest in a proper trailer, quality windows and doors, good insulation, ventilation, and reliable mechanical systems. Those choices affect safety and long‑term value.
What layout and design mistakes reduce usable space?
Poor loft access, oversized circulation areas, and inefficient kitchen/bath layouts waste space. Overlooking storage integration and multi‑use furniture reduces functionality. Ensure plans address clearances and daily routines.
How important is accurate framing for strength and square?
Critical. Proper stud spacing, correct installation of king studs and headers, and double top plates maintain structural integrity. Inaccurate framing causes misaligned doors, windows, and finish problems.
What roofing and loft details often cause leaks or sag over time?
Undersized rafters, missing hangers, inadequate ventilation, and improper flashing around penetrations lead to sag and moisture intrusion. Choosing appropriate metal roofing systems and ensuring continuous vents prevents many failures.
How should windows and doors be installed to avoid air and water leaks?
Use correct rough openings, level and plumb frames, apply layered flashing tapes or membranes, and shim properly before fastening. Seal joints and test with water to confirm watertight installation.
What electrical and plumbing mistakes compromise safety?
Undersized panels, incorrect wire gauges, poor circuit planning, and missing protection plates can create fire hazards. For plumbing, avoid long PEX runs without support, perform pressure tests, and place fixtures to allow proper venting and access.
How should insulation and air sealing be approached for different climates?
Choose R‑values appropriate for the climate and assembly (walls, roof, floor). Prioritize continuous air barriers, taped seams, and proper vapor management. In cold climates, focus on floor insulation and thermal breaks at the trailer interface.
What materials perform best for durability without excessive weight?
Use lightweight structural panels, quality exterior sheathing, and corrosion‑resistant fasteners. Select marine‑grade plywood or aluminum where moisture and weight are concerns. Balance durability with towable weight limits.
How can builders avoid overloading the trailer?
Calculate predicted finished weight, then compare to axle and tire ratings. Distribute heavy items over axles, keep center of gravity low, and use load cells or scales during mock‑ups to verify balance and compliance with tow limits.
What quality checks should be done before finishing touches?
Inspect framing square and plumb, verify waterproofing details, test electrical and plumbing systems, and confirm insulation coverage. Correct issues early; repairs after finishes are costly and time‑consuming.
What legal and zoning issues should be addressed early in the project?
Research local permits, parking rules, utility hookup requirements, and classification as an RV or dwelling. Consider RVIA or NOAH certification if selling or needing standard compliance. Early contact with authorities avoids costly delays.n become a sustainable, comfortable home that perfectly reflects your vision.
Related Articles
- Constructing Energy-Efficient Roofing: Materials and Techniques
- DIY Smart Home Integration for Energy Management
- Reclaimed and Upcycled Materials: Building a Sustainable Tiny House
- DIY Insulated Walls: How to Build for Maximum Heat Retention
- Building a Compact Bathroom: Design and Construction Tips
More from This Category
- DIY Tiny House Plumbing System: What You Need to Know
- How to Build an Outdoor Deck or Patio for Your Tiny Home
- DIY Sustainable Flooring Options for Tiny Houses
- Creating Built-In Storage Solutions During Construction: The Definitive Guide
- Installing Off-Grid Power Solutions: A DIY Guide
Additional Resources
- Building a Rainwater Collection System for Your Tiny Home
- Waterproofing Your Tiny House: Essential Steps for Longevity
- Budget-Friendly Tiny House Construction: Cost-Cutting Strategies
- Constructing Energy-Efficient Windows and Doors for Tiny Homes
- DIY Solar Panel Installation for Your Tiny House
- How to Install Insulation for Maximum Energy Efficiency
- Building a Tiny House Foundation: A Complete Guide
- Top 10 Construction Mistakes to Avoid When Building a Tiny House
- Essential Tools and Equipment for DIY Tiny House Construction
- Step-by-Step Guide to Building a Zero-Energy Tiny House