How to Build an Energy-Efficient Tiny House Roof opens with a striking fact: metal roofing can last 40–70 years, vastly outliving many common coverings and cutting long-term costs and waste.
The guide frames clear goals: optimize thermal performance, select lightweight materials, and protect weather sealing. It notes materials lifespans — EPDM and TPO membranes, shingles, cedar, and slate — and ties those choices to mobility and local climate.
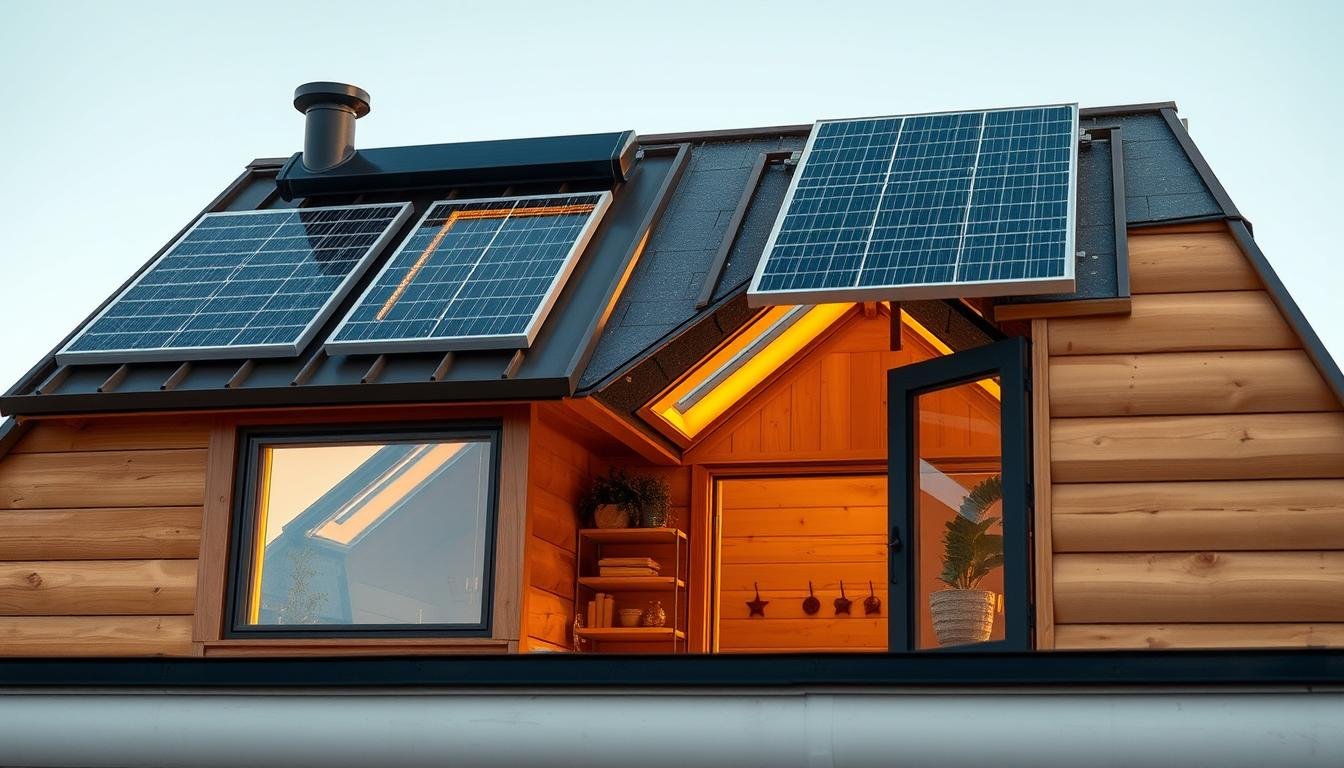
Design choices—gable, gambrel, shed, or hip—change headroom, storage, and drainage. Integrating solar panels or solar shingles requires careful mounting, wiring, and waterproofing so the home stays efficient over time.
Suppliers such as Metal Roofing Source, Owens Corning, 84 Lumber, and L&W Supply are named for sourcing panels, insulation, and framing. The section previews a stepwise approach from planning through final flashings that saves time and avoids rework.
Key Takeaways
- Choose durable, lightweight systems for long life and low maintenance.
- Match membrane and panel choices to slope and climate for best performance.
- Prioritize insulation, air sealing, and proper flashing for real efficiency gains.
- Plan solar integration early to preserve waterproofing and structure.
- Source materials from reputable U.S. suppliers for code and quality assurance.
How to Build an Energy-Efficient Tiny House Roof
Begin with clear priorities. Define energy targets, allowable roof weight, expected durability, and a budget tied to lifecycle costs.
Planning must reflect mobility, trailer axle ratings, and local climate. Choose materials with realistic lifespans: metal (40–70 years), asphalt shingles (20–30), EPDM (20–30), TPO (10–20), coatings (5–10). Owens Corning supplies fiberglass and spray foam that meet many insulation goals.
Defining Priorities: Energy Efficiency, Weight, Durability, And Budget
Translate priorities into design choices: slope, shape, and assembly depth to reserve space for insulation and ventilation paths. Confirm aerodynamic needs if the tiny home travels.
Sequencing The Build: From Planning To Weatherproofing
Follow a clear construction order: frame, sheathing, house wrap, flashing, drip edge, ice-and-water shield, roofing panels or shingles, ridge cap, then sealing.
“Document every decision. A well-marked build log avoids costly rework and keeps performance goals aligned with installation.”
| Stage | Key Tasks | Priority |
|---|---|---|
| Planning | Weight limits, climate, budget, materials life | High |
| Assembly | Frame, sheathing, insulation placement | High |
| Weatherproofing | House wrap, flashing, ice-and-water shield | Critical |
| Finish | Panels/shingles, ridge cap, seals | Medium |
- Set insulation R-value targets early and pick spray foam or fiberglass based on space and cost.
- Build a timeline with milestones, inspections, and contingency for vents, skylights, and solar hardware.
- Document decisions to keep construction aligned with the original design and performance goals.
Understanding Tiny House Roof Design For Different Climates
Different climates demand distinct roof strategies that match weather, loads, and solar exposure. Designers must balance materials, slope, and ventilation so the assembly resists local forces and keeps interior temperature stable.
Cold And Snowy Regions: Steeper Pitches, Ice Barriers, And Load Considerations
In snowy areas, steeper slopes shed snow and reduce ice dam risk. Rafters should be sized for local snow loads and span limits.
Ice-and-water shields at eaves and valleys prevent water intrusion when snow melts. Continuous air barriers and targeted ventilation stabilize temperature and cut ice formation.
Hot And Sunny Regions: Reflective Surfaces, Venting, And Radiant Barriers
In hot climates, reflective metal and cool coatings lower roof surface heat. Pair these finishes with radiant barriers and ridge or soffit venting to reduce attic temperature.
Design overhangs and shading for cross-ventilation to limit solar gain on the envelope and improve energy performance.
Wind And Storm Zones: Aerodynamics And Fastening Systems
Streamlined forms such as hip roofs resist uplift. Reinforced fastening schedules and detailed edge metal are essential in high-wind areas.
Validate fastening patterns and materials against local codes and expected wind loads for safety and longevity.
- Coordinate materials: metal and cool coatings for heat, robust underlayments for driving rain.
- Plan drainage and gutters sized for regional rainfall so water moves away from the home.
- Balance interior space needs: steeper pitches add loft volume; low-slope sheds favor modern solar layouts.
| Climate | Recommended Slope | Key Materials | Primary Benefit |
|---|---|---|---|
| Cold / Snow | Steep (6:12+) | Metal panels, ice-and-water shield, rigid insulation | Snow shedding, reduced ice dams |
| Hot / Sunny | Low to Moderate | Reflective metal, cool coatings, radiant barrier | Lower roof heat, reduced cooling load |
| Wind / Storm | Moderate; hip preferred | Reinforced fasteners, edge metal, sealed flashing | Uplift resistance, durability |
Choosing Roof Shapes That Maximize Space And Efficiency
Roof form directly shapes usable lofts, storage cavities, and daylight strategies inside a compact footprint.
Gable, Gambrel, Shed, And Hip: Trade-Offs For Headroom And Storage
Gable is DIY-friendly and drains well. It offers simple framing that keeps build time low.
Gambrel increases loft headroom and storage. It is ideal when maximizing vertical space matters.
Shed is modern and solar-ready. A single slope simplifies panel placement and daylighting.
Hip resists wind and offers durable performance in exposed climates. It adds complexity but improves resilience.
Low-Slope And Flat Concepts For Solar And Green Roofs
Low-slope and flat options pair well with EPDM or TPO membranes and tapered insulation for positive drainage.
These forms support green roof systems and make routing solar arrays straightforward.
“Match geometry with materials and site constraints before finalizing framing and flashing.”
- Compare shapes by interior space: gambrel maximizes headroom and storage; gable provides simple framing.
- Coordinate framing with wood or light cold-formed metal to keep the build practical.
- Detail soffits, overhangs, and ridge lines to preserve airflow and control bulk water.
- Pick the option that suits site limits, maintenance plans, and the desired balance of form and function.
Metal Roofs For Tiny Homes: Lightweight, Durable, And Efficient
Durable metal assemblies offer reflectivity that lowers peak cooling demand and lasts decades. Metal roofing commonly provides a 40–70 year lifespan, combines low weight with strong performance, and can reduce cooling loads when finished in reflective colors.

Standing Seam Vs. Corrugated: Weatherproofing And Aesthetics
Standing seam conceals fasteners for superior weather-tightness and a sleek profile. It suits owners who value a clean design and fewer leak paths.
Corrugated panels cost less and are simple to install. Visible fasteners make them economical but require careful sealing at penetrations.
Aluminum Vs. Steel: Weight, Corrosion Resistance, And Cost
Aluminum is lighter and resists corrosion—ideal for coastal or humid sites and for moves. Steel gives greater strength and value when coated properly.
Noise, Condensation, And Underlayment Choices
Proper underlayments and vented assemblies manage condensation and cut rain noise without adding excessive weight. Synthetic membranes and integral barriers work well for most materials.
- Plan fastening patterns per manufacturer guidance, especially at eaves and ridges.
- Use compatible flashing and sealants for vents and solar mounts.
- Factor lifecycle costs: metal often wins on long-term maintenance and reduced replacement costs.
Source panels, trims, and ridge caps from trusted suppliers like Metal Roofing Source to ensure profile compatibility and consistent weather-tightness.
Membrane Roofing Options: EPDM, TPO, And Elastomeric Coatings
Low-slope membranes demand relentless attention to seams and drainage details for long-term performance. These systems provide continuous waterproofing that suits compact footprints and simplified detailing.
When Low-Slope Makes Sense: Waterproofing Strategies
Low-pitch assemblies must move water quickly. Designers should plan tapered insulation or crickets so water does not pool.
Termination bars, compatible flashings, and sealed penetrations preserve the waterproof envelope. Positive slope and roof drainage are non-negotiable.
DIY Versus Pro Install: Heat-Welded Seams And Coating Lifecycles
EPDM offers large-roll coverage and long life (about 25–35 years). It has strong DIY appeal but needs careful corner and penetration detailing.
TPO uses heat-welded seams for tight joints and bright reflective finishes. It often requires professional equipment and installers and typically lasts 10–20 years.
Elastomeric coatings are the lowest-cost option and are DIY-friendly. Expect a 5–10 year lifecycle and periodic recoats as part of routine maintenance.
“Select the membrane that best balances upfront costs, installation complexity, and long-term maintenance.”
| Option | Lifespan (Years) | Install Skill | Primary Benefit |
|---|---|---|---|
| EPDM | 25–35 | Advanced DIY / Pro | Durable, large rolls, good for tight details |
| TPO | 10–20 | Professional | Heat-welded seams, reflective surface |
| Elastomeric Coating | 5–10 | DIY | Cost-effective, easy recoats |
- Match materials to low-slope concepts where continuous waterproofing matters most.
- Compare costs over time and include maintenance and recoat schedules in life-cycle planning.
- Ensure insulation and proper venting are part of the assembly to avoid trapped moisture in small spaces.
Asphalt Shingles And Synthetic Alternatives
Asphalt shingles remain a cost-effective choice for many compact builds. They are affordable, widely available, and familiar to DIY installers. Architectural asphalt offers better wind resistance and layered appearance while keeping installation time predictable.

Architectural Shingles For DIY Builds
Architectural shingles provide improved durability and style without complex tools. They last about 20–30 years when ventilated well and inspected regularly.
Maintenance includes checking flashing, maintaining ventilation, and repairing storm damage promptly. These steps extend service life and protect living comfort inside the home.
Composite And Polymer Options For Weight And Longevity
Composite and polymer products mimic slate, tiles, or wood shakes while saving weight. They offer better impact and fire resistance than real wood and often carry longer warranties.
Design goals matter: choose asphalt for classic looks and lower upfront costs, or select synthetics for long-term performance in hot or wet climates.
- Water shedding: steeper slopes, starter courses, and proper underlayment prevent leaks.
- Heat management: adequate venting reduces shingle degradation in extreme sun.
- Solar compatibility: confirm flashing kits and mounts that preserve warranties.
| Type | Lifespan (Years) | Weight | Best For |
|---|---|---|---|
| Architectural Asphalt | 20–30 | Moderate | DIY builds, budget-conscious design |
| Composite / Polymer | 30+ | Light | Longevity, coastal or fire-risk sites |
| Polymer Wood-Imitation | 25–40 | Light | Wood look without moisture upkeep |
When weighing initial costs against lifecycle benefits, consider energy, maintenance, and long-term durability. For readers seeking more on energy savings and shingle choices, see energy-efficient shingles.
Natural Looks: Cedar Shakes And Slate Considerations
Rustic shakes and stone tiles deliver character, yet each material brings unique load and care needs. Owners should weigh visual goals against structural limits and upkeep time.
Maintenance Routines, Fire Resistance, And Structural Load
Cedar shakes offer warm wood character and some pest resistance. They typically last 15–30 years with regular cleaning and sealing. Regular inspection of fasteners and seams prevents moisture ingress.
Slate tiles can last many decades and resist weather well, but their weight often requires reinforcement of framing. On wheeled tiny homes, owners must confirm axle capacity before choosing slate.
- Fire: slate is naturally fire resistant; cedar needs treatment in high-risk areas and must meet local codes.
- Underlayment & ventilation: use breathable membranes and vent paths for wood systems to speed drying.
- Flashing: detail valleys, skylights, and chimneys with thick-profile flashings matched to shakes or rigid tiles.
- Accessories: pick ridge, hip, and starter panels that match the natural profile for cohesive waterproofing.
Skilled installers are often required for natural materials. For compact builds and sourcing guidance, see the practical primer at roofing for tiny houses.
“Natural finishes reward time and care; plan inspections and structural checks before installation.”
Insulation And Air Sealing For Tiny House Roof Efficiency
A tight roof assembly starts with clear insulation targets that match climate and framing constraints. Define an R-value goal and pick materials that meet that target without compressing in short cavities. Proper air sealing prevents moist air from reaching cold surfaces where condensation and water damage can start.

Spray Foam, Fiberglass Batts, And Rigid Foam Boards
Spray foam provides high R-value and superior airtightness in confined spaces. It reduces leakage at seams and around wiring, improving overall energy efficiency.
Fiberglass batts and rigid boards are lower cost and perform well when installed without compression. Owens Corning supplies verified fiberglass and foam options that help meet code and performance goals.
Thermal Bridging, Radiant Barriers, And Vapor Control
Reduce thermal bridging with continuous exterior insulation or insulated baffles that keep vent paths open. Radiant barriers under the deck cut heat flow in hot climates and boost comfort.
Vapor control must follow local climate rules: use smart or class-specific barriers so moisture does not accumulate inside the assembly. Seal all penetrations—fasteners, vents, and stacks—to maintain airtightness and protect the home from water issues.
| Option | Typical R-Value per Inch | Primary Benefit | Best Use |
|---|---|---|---|
| Closed-Cell Spray Foam | ~6.5 | Airtight, moisture barrier, high R | Shallow cavities, mobile roofs |
| Fiberglass Batt | ~3.2 | Cost-effective, easy install | Deep cavities, budget builds |
| Rigid Foam Board | ~4.0–5.0 | Continuous insulation, reduces bridging | Exterior sheathing or under deck |
- Coordinate insulation depth with framing so batts are not compressed and R-values remain valid.
- Pair insulation with soffit-to-ridge ventilation where possible to manage humidity and temperature swings.
- Validate envelope quality with blower-door testing when feasible and follow manufacturer instructions for materials.
- For practical installation guidance, see the tiny house insulation guide and tips on installation for maximum energy efficiency.
Ventilation, Moisture Management, And Indoor Comfort
A coordinated ventilation plan prevents trapped moisture and reduces peak temperature swings. This keeps insulation performing and helps protect framing from water damage.
Soffit And Ridge Vents, Attic Fans, And Airflow Paths
Define a balanced system with continuous soffit intake and ridge exhaust to stabilize temperature and protect insulation from moisture. Proper intake and exhaust reduce heat buildup and extend material life.
- Continuous Soffit + Ridge: Provides passive, balanced airflow across the cavity.
- Attic / Cavity Fans: Use in hot climates to exhaust trapped heat during peak sun.
- Baffles & Clear Paths: Keep airflow clear around batts and boards so the vent can work.
Flashing Details To Prevent Leaks Around Openings
Detail flashing at skylights, vents, and pipe penetrations with compatible boots, step flashing, and tape. Install drip edges, ice-and-water shield, and counterflashing at eaves and valleys to manage bulk water and deter ice dams.
- Pair house wrap and flashing tape at rough openings for reliable water defense.
- Schedule routine maintenance inspections after storms to catch small breaches early.
- Document every penetration, flashing type, and curb detail for future warranty checks and repair planning.
Integrating Solar Panels And Solar Shingles On Tiny Roofs
Solar arrays can turn limited roof areas into reliable daily power for off-grid living. Designers should balance panel placement, weight limits, and realistic energy needs before cutting any penetrations.

Planning early keeps wiring tidy, preserves waterproofing, and helps owners estimate savings and payback. Flexible panels and solar shingles cut weight and lower profile height, which suits mobile tiny homes and modern design goals.
Mounting, Wire Runs, And Battery Storage Planning
Match mounts to the existing surface—standing seam clamps for metal roofs or flashed rails for shingle systems—to avoid unnecessary holes. Route cable in UV-rated conduit with drip loops and strain relief at terminations.
Allocate battery storage space with proper ventilation and service clearances. Coordinate inverter, charge controller, and monitoring so the system supports future expansion and meets code.
Weight, Wind Uplift, And Roof Penetration Best Practices
Verify weight and uplift calculations before installation. Reinforce attachment points and edge details where wind exposure is high.
- Use flashed penetrations and manufacturer-approved sealants to protect the assembly and preserve warranties.
- Consider solar shingles when aesthetics matter, weighing efficiency per square foot against available areas.
- Quantify potential energy savings and incentives; tax credits can offset upfront costs and speed payback.
“Plan array size and orientation to fit limited roof area and match loads to realistic daily energy needs.”
For a practical installation sequence and integration tips, see the step-by-step guide.
Weight, Structure, And Mobility For Tiny Homes On Wheels
Mobility demands careful weight planning so the trailer and top structure perform safely on the road. Designers must confirm axle capacity before finalizing material choices.
Trailer Axle Limits, Roof Weight Choices, And Balance
Confirm trailer axle ratings and reserve a safety margin for roof panels, fasteners, mounts, and gear. This protects brakes, tires, and suspension during trips.
Select lightweight metals and synthetic coverings rather than heavy stone or tile when the home will travel. These choices cut mass while keeping durability high.
- Balance front-to-rear and side-to-side loads so towing dynamics and braking remain predictable.
- Prefer low-profile shapes and aerodynamic accessories to reduce drag and wind noise on highways.
- Verify fastener schedules and add secondary restraints against vibration and uplift.
- Account for solar panels or HVAC as added weight and place them to keep the center of gravity low.
- Document weights of all roof assemblies and accessories for compliance and safe trip planning.
“Lightweight materials and smart load placement make mobility feasible without compromising comfort or durability.”
For mobile foundation guidance and trailer-first sequencing, consult this trailer foundations guide.
Step-By-Step: From Sheathing To Finished Roof
A clear, repeatable sequence keeps the roof assembly water-tight and ready for finish materials. This short workflow shows the key stages and the expected time order for a safe, durable finish.
Sheathing, Underlayments, And Ice-And-Water Shields
Start with 1/2-inch OSB sheathing from 84 Lumber, fastened on a straight layout. Tight seams and correct nail patterns support the layers above.
Wrap the deck with house wrap, then add synthetic underlayment. Apply ice-and-water shield at eaves, valleys, and around penetrations to control water and ice migration.
Panel Or Shingle Installation, Ridge Caps, And Sealing
Install metal panels from Metal Roofing Source or asphalt shingles per manufacturer patterns. Align courses so water sheds cleanly and limit offsets that trap debris.
Cap the ridge with matching components and add designed ventilation for soffit-to-ridge flow. Fill gaps with spray foam where recommended and seal terminations with flashing tape and silicone.

Final Inspections, Touch-Ups, And Clean-Up
Use wood blocking under mounts where needed and protect insulation from weather during work. Owens Corning spray foam or batt installs should occur at the right stage to avoid soiling or compression.
- Check fasteners, laps, and flashing for complete seals.
- Remove debris and run a final leak test if possible.
- Document materials, warranties, and photos for future service and resale.
“A documented finish and one final inspection reduce callbacks and extend service life.”
Costs, Budgeting, And Long-Term Savings
Budgeting for a compact roof requires balancing upfront spend with decades of performance. Owners should compare material ranges and add labor, tools, and underlayment to true totals.
Material And Installation Ranges For Popular Options
Average material costs vary: asphalt shingles $1.00–$2.50/sq ft; metal panels $3.00–$7.00; synthetic roofing $4.00–$6.00; cedar shakes $5.00–$8.00; recycled materials $4.00–$7.00; EPDM $1.50–$4.00.
DIY can save money but adds tool and time expense. Professional installation raises the initial cost but lowers risk and callbacks.
Energy Savings, Maintenance, And Total Cost Of Ownership
Long-term savings come from better insulation, reflective finishes, and durable panels that cut replacement cycles.
- Factor routine maintenance: recoats, flashing checks, and inspections into lifecycle budgets.
- Model energy reductions from cool finishes and airtight assemblies to estimate annual money saved.
- Reserve contingency for accessories, high-wind fastening, and future solar hardware.
- Consider environmental footprint when choosing durable materials that reduce replacement waste.
| System | Typical Cost / sq ft | Primary Long-Term Benefit |
|---|---|---|
| Asphalt Shingles | $1.00–$2.50 | Low upfront cost, familiar repairs |
| Metal Panels | $3.00–$7.00 | Durability, reflectivity, long life |
| EPDM | $1.50–$4.00 | Low-slope waterproofing, low weight |
“Prioritize core weatherproofing and insulation; finishes can follow once the envelope is secure.”
Codes, Permits, And Certifications In The United States
Before nails hit wood, owners must confirm zoning, permit paths, and certification needs for safe, legal occupancy. This early review guides planning, materials, and the timeline for inspections.
Zoning, Utility Hookups, And Mobility Rules
Research local zoning to learn where a tiny house can be sited, parked, or occupied. Jurisdictions treat on-wheels and foundation builds very differently.
Clarify utility hookup rules for water, sewer, and electrical. Some areas require permanent connections; others permit off-grid systems with approvals.
NOAH And RVIA: Compliance And Resale Confidence
Certification supports resale and insurance. Consider NOAH certification for construction standards and tiny house certification that documents safety and code alignment.
RVIA certifies units as RVs, which often eases registration, campground access, and insurability for homes on trailers.
- Identify required building, electrical, plumbing, or transport permits and align timelines with inspections.
- Include manufacturer installation instructions in permit packets to show conformance for roofing and waterproofing systems.
- Understand code-driven impacts on assemblies: fire ratings, wind uplift, and snow loads can change material choices.
- Treat documentation and certification as a system-level safeguard that protects durability and resale value.
“Coordinate inspections early; catching issues before finishes go on saves time and money.”
Where To Source Roofing, Insulation, And Supplies
Buyers should centralize orders with a few national suppliers so delivery windows and warranties match the construction schedule.
Start by sourcing framing, sheathing, and exterior cladding from 84 Lumber. This reduces coordination time and keeps materials consistent for the project.
National Suppliers And DIY-Friendly Ordering
Order metal panels and matched trims from Metal Roofing Source for DIY-friendly packages that include ridge caps and accessories. Matched systems cut install time and lower leak risk.
Buy insulation, vapor barriers, and interior boards through L&W Supply for dependable stock and nationwide delivery. Choose Owens Corning fiberglass or foam products where verified thermal performance matters.
- Compare costs across suppliers and request bundled shipping to save money and simplify logistics.
- Choose light, pre-cut components where available to reduce on-site handling and speed installation time.
- Confirm lead times and accessory availability—flashing kits, fasteners, sealants, and solar panels hardware—before work begins.
- Verify return policies and warranty support to protect the budget when quantities change.
“An organized materials list tied to the construction schedule prevents costly delays and unplanned purchases.”
Final step: keep a short procurement checklist and track deliveries against milestones so the tiny home build stays on budget and on time.
Conclusion
Smart geometry and the right materials turn a compact top into a durable, flexible platform. A disciplined design and staged assembly raise energy efficiency while protecting precious space in a tiny house.
The right mix—metals for long life and reflectivity, membranes for low-slope waterproofing, and shingles or synthetics for DIY-friendly durability—depends on climate and design goals.
Insulation, ventilation, and careful flashing drive real comfort and lower long-term costs. Align structure and weight with mobility plans to protect safety for a tiny home on wheels.
Use trusted suppliers and tested sequences, plan for solar readiness, and favor choices that shrink your long-term footprint. For practical sourcing and lightweight options, see lightweight roofing options.
Result: A well-executed roof protects the investment, improves daily living, and supports a sustainable tiny home lifestyle with lower energy use and a smaller footprint.