Insulating a small home cut heating bills by about 30%, according to the DOE — a striking payoff for smart upgrades. This guide opens with clear, practical steps that prioritize sealing air leaks, limiting thermal bridges, and picking materials suited to climate zones.
The short envelope of a tiny house changes how heat moves. A tight assembly stabilizes indoor comfort through cold snaps and hot spells. Owners learned that sealing comes first, then adding cavity fills or thin exterior foam to stop stud losses.
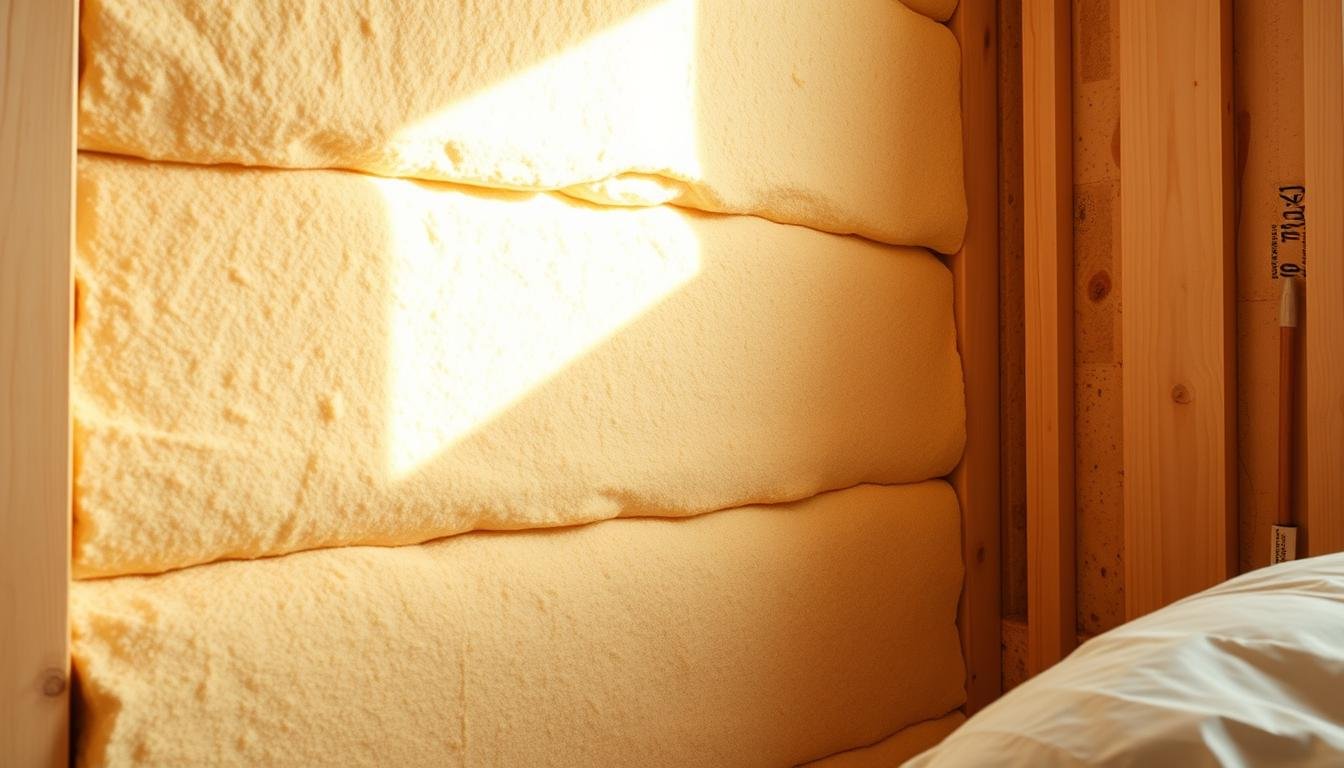
High-performance options, like closed-cell spray foam, deliver strong R-values per inch and add moisture control. Mineral wool offers fire and sound resistance when space allows. The DOE’s R-value targets guide choices from R13 up to R20+ depending on climate zone.
Key Takeaways
- Start with air sealing, then insulate cavities for best results.
- Closed-cell spray foam and rigid boards work well in narrow studs.
- Match R-values to your DOE climate zone for roofs, floors, and walls.
- Proper installs often cut energy bills near 30%, improving payback.
- DIY kits handle many tasks, but whole-house spray may need pros.
Tiny House Wall Insulation Fundamentals And User Intent
Compact living changes the pace of heat movement and makes losses more noticeable. This section explains how heat moves, why sealing matters first, and what to fix to get real energy savings.
How Heat Transfer Works In Tiny Houses
Conduction moves heat through solids like studs and metal frames. Convection moves warm air out through gaps and drafts. Radiation sends heat across surfaces.
Limited volume makes each mode feel stronger. That is why insulating tiny spaces must consider all three paths.
Why Air Sealing Matters More Than Added R-Value
Uncontrolled air movement causes the largest losses. Seal doors, windows, outlets, and frame joints first using expanding spray foam and high-quality tape.
Thermal bridging through studs and trailer frames can bypass R-values. Continuous exterior layers or thermal breaks stop that loss. Proper fit prevents compression and voids that reduce performance over time.
| Mode | How It Occurs | Best Fix |
|---|---|---|
| Conduction | Heat through studs and metal | Exterior continuous layer |
| Convection | Air leaks, drafts, gaps | Air sealing at penetrations |
| Radiation | Surface-to-surface loss | Reflective or dense materials |
Prioritized plan: air seal first, insulate cavities next, then add exterior layers. For research on performance, see recent energy studies. For practical installation tips, consult this installation guide.
Climate Zone Planning And Target R-Values For U.S. Tiny Houses
Regional climate zones set clear R-value goals that guide material choices and assembly layers. Matching targets to location protects comfort and reduces energy loss in a small home.

DOE Climate Zones And Recommended R-Values
DOE guidance maps zones 1–8 to attic, floor, and wall targets. Colder zones need higher attic and floor resistance; warmer zones allow lower targets. Use the listed R-values as starting points when planning.
Setting Wall, Roof, And Floor Targets By Region
- Zone 1–2: Attic R30–R60, Floor R13.
- Zone 3–4: Attic R49–R60, Floor R19, Wall options like R20 or R13+R5 CI.
- Zone 5–8: Attic R60, Floor R30–R38, and CI-rich wall assemblies up to R0+R20 CI.
Continuous Insulation To Reduce Thermal Bridging
Continuous insulation (CI) wraps the exterior and cuts conductive transfer through studs and frames. Common choices include rigid foam boards or insulated sheathing.
| Assembly | Practical Target | Typical CI Thickness |
|---|---|---|
| Wall | R13 + R5 CI or R0 + R15 CI | 0.5–1.5 inch foam boards (R5–R15) |
| Roof/Attic | R49–R60 | Layered batts or spray foam insulation to meet depth |
| Floor | R13–R38 depending on zone | Rigid foam between joists or under decking |
“Smaller interiors amplify performance differences, so hit DOE targets for real comfort.”
For a practical checklist and product ideas, consult the tiny house insulation guide before finalizing materials and layout.
Step-By-Step DIY: Build A Tight Thermal Envelope
Start with a measured approach: find where air moves and stop it first. A focused sequence reduces energy loss and makes later layers work as intended.
Seal Air Leaks: Windows, Doors, Penetrations, And Joints
Use a smoke pen or blower-door–like test to locate drafts around openings and receptacles. Seal gaps with caulk, gaskets, and expanding spray foam.
Install backer rod in wide gaps, then apply high-performance tape at sheathing seams and WRB overlaps. This step cuts convective loss immediately.
Break Thermal Bridges: Studs, Trailer Frames, And Rafters
Add continuous exterior foam or rigid boards to isolate studs and metal frames. Where the trailer chassis meets framing, insert thermal breaks at fasteners.
Install Insulation: Walls First, Then Roof, Then Floor
Fit cavity fills before roofing layers to keep access simple. Use closed-cell spray foam or mineral wool that resists sagging. Finish the roof, then seal the floor perimeter tightly.

Moisture Management: Vapor Control And Drying Paths
Place vapor retarders per climate. Closed-cell spray foam can serve as an air and vapor barrier in cold climates. Always allow a drying path to avoid trapped moisture.
Finishing Touches: Taping, Trimming, And Inspection
Tape all seams, trim excess foam, and inspect transitions at window, roof, and floor interfaces. Document R-values and assembly layers for future upgrades.
| Step | Action | Key Product |
|---|---|---|
| Find Leaks | Smoke test, seal penetrations | Caulk, gaskets, spray foam |
| Thermal Breaks | Add continuous exterior layers | Rigid foam boards, tape |
| Install Cavities | Walls → Roof → Floor | Closed-cell spray foam, mineral wool |
| Moisture Control | Vapor retarder placement | Vapor membrane or closed-cell foam |
For a detailed sealing checklist and practical tips, see the insulation guide and this air-sealing how-to.
Best Insulation Materials For Tiny Houses: Performance And Trade-Offs
Material choice affects thermal performance, moisture control, weight, and cost. This short guide compares leading options so readers can match priorities to climate and mobility.
Closed-Cell Spray Foam: High R-Value, Air And Moisture Control
Pros: Very high R per inch (~R-5.6–8.0/in), acts as an air and moisture barrier, and adds structural rigidity.
Cons: Higher cost and added weight; professional application often recommended.
Open-Cell Spray Foam: Lower Cost, Lower Moisture Resistance
Pros: Lower cost, expands to fill gaps, and improves sound dampening.
Cons: Lower R (~R-3.5–3.7/in) and poorer moisture resistance—requires a dedicated vapor strategy.
Fiberglass Batts: Budget-Friendly But Gap-Sensitive
Fiberglass gives decent R (~R-2.9–3.8/in) at low cost. It needs perfect fit and no compression to work well.
Mineral Wool: Shape Stability, Fire And Sound Resistance
Mineral wool offers fire resistance, dimensional stability, and sound control (~R-3.2–4.1/in). It pairs well with exterior continuous foam.
| Material | R per Inch | Best Use |
|---|---|---|
| Closed-Cell Foam | 5.6–8.0 | Cavities, roof, moisture barrier |
| Open-Cell Foam | 3.5–3.7 | Gaps, sound control |
| Fiberglass | 2.9–3.8 | Budget cavity fills |
| Mineral Wool | 3.2–4.1 | Fire/sound sensitive areas |
Tip: Pair materials—for example, mineral wool in cavities plus exterior polyiso—to balance cost, moisture safety, and overall R-value.
Wall Assemblies That Maximize Heat Retention
A well-detailed wall assembly turns thin framing into a high-performance thermal barrier.

Stud Cavity Strategies: Fit cavity fills so they touch framing without compressing. Use friction-fit mineral wool or custom-trimmed fiberglass for straight cavities.
For odd gaps, closed-cell foam fills irregular spaces and can act as a vapor retarder in cold climates. Cut batts precisely to avoid voids and sag.
Exterior Continuous Insulation To Limit Stud Losses
Adding 1–2 inches of rigid foam boards such as polyiso or XPS reduces stud conduction and raises whole-wall R-value. Combine plywood or OSB sheathing over foam when structural nailing is needed.
Air And Vapor Layers: Placement For Different Climates
Keep the air and water-resistive barrier continuous at corners, window bucks, and penetrations to stop unwanted drafts. Flash and tape transitions for airtight performance.
- Cold zones: place an interior vapor retarder or use thicker exterior foam to move the dew point outward.
- Mixed/warm zones: choose smart membranes or exterior foam and ensure one clear drying path.
- Avoid double vapor barriers that trap moisture and reduce drying potential.
For material choices that pair well with exterior CI, see recommended exterior wall materials.
“Consistent detailing at corners, windows, and service penetrations prevents hidden thermal bridges.”
Roof, Floor, Windows, And Doors: Closing The Remaining Gaps
Attention to roof, floor, and openings turns good insulation into great performance. Final details stop the last leaks that cut comfort and raise energy bills. The following guidance focuses on practical assemblies and careful sealing.

High-R Roofs: Spray Foam In Rafters And Over-Deck Foam
Target attic/roof R49–R60 by combining cavity spray foam and over-deck rigid foam. In 2×6 rafters, use closed-cell spray foam in cavities for air and moisture control.
Over-deck foam boards curb rafter thermal bridges and raise whole-roof R-value. Seal skylights, vents, and flashings meticulously to prevent drafts and moisture entry.
Cold-Fighting Floors: Rigid Foam Between Joists And Edge Sealing
Install rigid foam boards between floor joists and seal edges with low-expansion spray foam. Add insulated skirting below a mobile chassis to reduce underfloor losses.
Treat metal trailer members as thermal bridges. Use foam isolation, thermal-break washers, or tape at fasteners to limit conduction through the frame.
Windows And Doors: Glazing Choices, Weatherstripping, And Caulking
Upgrade to double or triple glazing with low-e coatings to cut radiant and conductive losses. Backer rod and continuous sealant at frames block micro-gaps.
Use quality weatherstripping, door sweeps, and low-expansion foam around jambs to stop drafts. Interior thermal curtains and balanced shading reduce daytime heat gain and night losses.
| Area | Recommended Detail | Key Benefit |
|---|---|---|
| Roof | Closed-cell spray foam in rafters + 1″–2″ over-deck rigid foam | Meets R49–R60, reduces thermal bridging |
| Floor | Rigid foam boards between joists, edge sealed with spray foam | Limits cold transfer, seals gaps under decking |
| Openings | Double/triple glazing, backer rod, weatherstrips, insulated doors | Stops drafts, improves whole-home efficiency |
Tiny House Mobility, Weight Limits, And Space Constraints
When mobility is central, every pound in the envelope affects towing and fuel costs.
Material mass changes tongue weight, axle load, and highway efficiency. Dense products like mineral wool raise payload and can push a trailer toward its GVWR faster than foam boards or spray systems.

Material Weight Versus Towing And Fuel Use
Heavier assemblies increase fuel consumption and stress braking and suspension. Builders should compare installed weight per square foot when choosing between dense batts and lighter foams.
Closed-cell spray foam and rigid polyiso offer high R per inch and lower mass, easing transport while keeping heat performance high.
For data on how mass affects trailer loads, see a practical breakdown of how much mobile dwellings weigh at typical GVWR examples.
Thin, High-R Solutions For Narrow Cavities
Where depth is limited, high-R-per-inch options win. Closed-cell spray foam and polyiso rigid boards deliver strong thermal gains within tight cavities.
- Bonded foam layers resist vibration and reduce settling compared with loose or poorly fastened batts.
- Combining a thin interior layer with exterior continuous foam achieves whole-assembly R without sacrificing interior space.
- Always weigh materials and compare installed R to ensure compliance with trailer limits and climate targets.
For DIY builders focused on thin, effective assemblies, consult the step-by-step guide on building insulated walls for maximum heat retention at DIY insulated walls.
Costs, Efficiency Payback, And DIY Versus Pro Installation
Budget choices often decide whether an upgrade pays back in months or years. This section lays out typical material costs, expected energy savings, and when to hire pros for spray work.
Material Cost Ranges And Where Money Saves The Most
Material-only averages (per sq ft unless noted): closed-cell spray foam $0.90–$1.00 per board ft; open-cell $0.30–$0.50; rigid foam boards $0.25–$0.75; fiberglass $0.30–$1.30; mineral wool $1.00–$2.50; denim $1.00–$2.00.
Where money saves most: air sealing and selective cavity upgrades give the best cost-to-benefit before adding thickness.
Energy Savings And Payback Timelines
Well-executed assemblies cut monthly energy use ~30%. That often returns the project cost in a few years, especially when higher-R products reduce HVAC load.
“Targeted sealing and high-R layers shorten payback more than simply adding bulk.”
When To Hire Pros For Spray Foam
Whole-house spray foam jobs usually require pro installation for equipment, safety, and quality control. Closed-cell spray foam can replace separate air and vapor layers, simplifying assemblies but raising upfront cost.
- DIY Friendly: fiberglass batts, rigid boards, and selective kits.
- Hire Pros: large spray foam installs, complex assemblies, or when warranty matters.
| Item | Typical Cost Range | Benefit |
|---|---|---|
| Closed-Cell Spray Foam | $0.90–$1.00/board ft | High R/in, air & vapor control |
| Rigid Foam Boards | $0.25–$0.75/sq ft | Thermal break, low weight |
| Fiberglass | $0.30–$1.30/sq ft | Low cost, DIY install |
Note: Correct installation prevents callbacks and moisture risks that can erase initial savings.
Conclusion
Practical upgrades that focus on sealing, thermal breaks, and high‑R layers deliver measurable savings. Start by sealing air leaks, then add continuous exterior foam to stop stud losses. Follow DOE R‑value targets for your climate to ensure comfort in winter and summer.
Closed-cell spray foam is a strong option where depth is limited and moisture control matters, though large spray jobs often need pros. When details are done right, owners can expect about a 30% drop in energy use and a big jump in comfort and durability.
For a compact checklist and product ideas, see the tiny house insulation guide to help with choosing the right materials and sequencing for best results.
FAQ
What are the core principles behind insulating a small mobile home for maximum heat retention?
The goal is to control heat transfer by combining high R-value materials with tight air sealing and proper moisture management. Insulation should reduce conduction through framing, stop convective heat loss by sealing gaps around windows, doors, and penetrations, and allow for drying to prevent mold. Continuous exterior layers and sealed interior air barriers work together to limit thermal bridging and drafts.
How does heat transfer occur and which path matters most in a compact dwelling?
Heat moves by conduction through solids, convection through air movement, and radiation across surfaces. In compact spaces, air leakage often causes the largest heat losses, so sealing cracks, joints, and utility penetrations typically yields bigger performance gains than simply adding more bulk insulation.
How should R-value targets change with climate zone when planning insulation?
Use Department of Energy guidance for regional targets: colder zones need higher wall, roof, and floor R-values; milder regions can use lower values. Match wall and roof targets to local recommendations and increase continuous insulation if cavity depths are limited or thermal bridging is a concern.
What is continuous insulation and why is it recommended?
Continuous insulation is an uninterrupted layer on the exterior that reduces heat flow through studs and framing. It minimizes thermal bridging, increases effective R-value, and improves moisture control when paired with correct air and vapor barriers.
What is the recommended order for a DIY build to achieve a tight thermal envelope?
Start with comprehensive air sealing around windows, doors, seams, and utility penetrations. Address thermal bridges by adding continuous layers or insulating studs. Install wall insulation first, then roof and floor. Finally, add vapor control and finish details like taping and trim while inspecting for missed gaps.
Which materials provide the best balance of performance and space for narrow cavities?
Closed-cell spray foam offers high R-value per inch and acts as an air and moisture barrier, making it a top choice where depth is limited. Polyiso and extruded polystyrene boards provide slim, rigid options. Mineral wool and fiberglass work if cavities allow full, gap-free installation.
What are the pros and cons of closed-cell versus open-cell spray foam?
Closed-cell foam delivers higher R-value per inch, resists moisture, and adds structural stiffness, but it costs more and adds weight. Open-cell is lighter, less expensive, and allows some permeability, yet it has lower R-value and reduced moisture resistance. Choice depends on budget, weight limits, and moisture control needs.
Is fiberglass batt still a viable option for small dwellings?
Fiberglass batts can be cost-effective, but they require precise fitting and effective air sealing to avoid gaps and compression. Without careful installation they underperform. They are best used where cavities are regular and an air barrier complements them.
How should moisture and vapor control be handled across different climates?
In cold climates, place the vapor retarder toward the warm interior to prevent condensation inside assemblies. In hot-humid climates, avoid interior vapor barriers that trap moisture and favor vapor-open exterior layers plus effective air sealing. Always provide a drying path and consider material permeability when designing the stack-up.
What strategies reduce thermal bridging through studs, trailer frames, and rafters?
Add continuous exterior rigid insulation, install interior insulated sheathing, or use advanced framing to reduce lumber area. Thermal breaks like foam gaskets or structural insulated panels also cut bridging. Spray foam that fills cavities and seals interfaces can help, too.
How should floors be insulated to prevent cold transfer and drafts?
Use rigid foam between and under joists, seal rim joists, and add edge sealing around the perimeter to stop cold air infiltration. For towable bases, isolate the frame with closed-cell foam where weight and profile permit.
Which window and door choices matter most for energy performance?
Choose glazing with low U-factor and appropriate solar heat gain coefficients for the climate. Install with continuous flashing, foam or backer rod and sealant, and add weatherstripping to reduce infiltration. Proper installation matters as much as the rated product.
How does mobility and weight limit material selection for a towable dwelling?
Lightweight, high-R materials such as closed-cell spray foam or polyiso boards deliver performance without excessive weight. Contractors and owners should balance R-value per inch with added mass to meet towing and fuel efficiency goals.
What are typical cost ranges and where do DIYers save most money?
Material costs vary widely: rigid boards and batts cost less per square foot than spray foam, while closed-cell foam carries higher upfront expense. DIYers save on labor by installing batts or rigid boards, but professional spray foam often yields better airtightness and long-term energy savings. Prioritize air sealing and correct installation to maximize value.
When is it advisable to hire professionals for spray foam application?
Hire pros when the project requires closed-cell foam, complex cavities, or when achieving a certified air barrier is critical. Professionals ensure correct mix, coverage, and safety controls to avoid off-ratio issues and health risks.
Are natural insulation options like wool or denim practical for compact builds?
Wool and recycled denim offer good environmental profiles and sound control. They require careful installation, can be thicker for equivalent R-value, and have higher material costs. They suit owners prioritizing natural materials and indoor air quality.
How should finishing details like taping and trim be approached to maintain performance?
Use compatible tapes and sealants on seams and penetrations. Trim and interior finishes should not compress or gap insulation. Inspect all junctions with windows, doors, and mechanical penetrations and correct leaks before closing up.
What safety or fire considerations apply to different insulation materials?
Mineral wool resists fire and maintains shape at high temperatures. Closed-cell foam may require thermal barriers (like gypsum) per code. Follow manufacturer guidelines for flame spread, install required barriers, and ensure ventilation and protective equipment during application.
How can owners verify that their assembly performs as intended after install?
Conduct blower door and infrared inspections to find leaks and gaps. Measure indoor comfort and energy use over a season to compare against expectations. Address any identified thermal bridges or air gaps with targeted fixes. For additional guidance, explore Energy.gov’s Insulation Guide.
Related Articles
- Constructing Energy-Efficient Roofing: Materials and Techniques
- DIY Smart Home Integration for Energy Management
- Reclaimed and Upcycled Materials: Building a Sustainable Tiny House
- DIY Insulated Walls: How to Build for Maximum Heat Retention
- Building a Compact Bathroom: Design and Construction Tips
More from This Category
- DIY Tiny House Plumbing System: What You Need to Know
- How to Build an Outdoor Deck or Patio for Your Tiny Home
- DIY Sustainable Flooring Options for Tiny Houses
- Creating Built-In Storage Solutions During Construction: The Definitive Guide
- Installing Off-Grid Power Solutions: A DIY Guide
Additional Resources
- Building a Rainwater Collection System for Your Tiny Home
- Waterproofing Your Tiny House: Essential Steps for Longevity
- Budget-Friendly Tiny House Construction: Cost-Cutting Strategies
- Constructing Energy-Efficient Windows and Doors for Tiny Homes
- DIY Solar Panel Installation for Your Tiny House
- How to Install Insulation for Maximum Energy Efficiency
- Building a Tiny House Foundation: A Complete Guide
- Top 10 Construction Mistakes to Avoid When Building a Tiny House
- Essential Tools and Equipment for DIY Tiny House Construction
- Step-by-Step Guide to Building a Zero-Energy Tiny House