Can a small budget truly deliver big comfort in a tiny house? That question frames every choice a builder makes. This guide shows practical, DIY-friendly options that fit shallow studs and tight spaces.

Reflective bubble radiant barriers can reflect up to 96% of radiant heat when installed as a true radiant barrier and taped to act as a vapor stop. Foam boards and spray foam add conductive R-value in small thicknesses. Together, these layers cut heat transfer without eating storage or living space.
The U.S. Department of Energy estimates proper materials and air sealing can trim heating bills by about 30%. This intro previews which options suit hot or cold climates, where to use spray foam sparingly, and the basic tools every DIYer needs: utility knife, staple gun, seam tape, and simple PPE.
Key Takeaways
- The guide lays out seven space-smart, budget-minded options and when to use each.
- Radiant barriers excel in warm regions; foam boards work well under floors.
- Smart air sealing multiplies performance and lowers energy bills.
- Small R-value gains matter more when combined with reduced thermal bridging.
- Simple tools and careful sequencing deliver pro-level results without full spray foam.
- Find detailed picks and links to products in the full buyer’s guide: budget-friendly tiny house options.
Cheap Insulation For Tiny Homes: What Buyers Should Know Right Now
Before buying, homeowners should map heat loss and air leaks to get the best return on materials. This first step targets the big paths: walls, roof, floors, windows, and doors. Sealing frames and penetrations often yields the fastest comfort gains.
Insulation and air sealing together can cut heating costs by about 30%, per DOE guidance. In compact spaces, sealing drafts warms surfaces and calms temperature swings fast.
Spray foam gives high R-value per inch (closed-cell ~R5.6–R8; open-cell ~R3.6) and helps control moisture. Fiberglass remains cost-effective but needs careful moisture management. Choice depends on climate, mobility, and where heat enters or leaves the house.
Key Benefits: Comfort, Energy Savings, And Moisture Control
- Comfort improves as drafts vanish and interior surfaces stay warmer.
- Energy use drops because a small envelope needs less heat to stay stable.
- Moisture control prevents rot and mold—vital in small, high-humidity rooms.
- Prioritize walls and roof for higher R-values; insulate floors over trailers to stop cold-foot issues.
| Area | Priority | Best Traits | Considerations |
|---|---|---|---|
| Walls | High | Continuous R, limit thermal bridges | Air seal studs and openings first |
| Roof/Ceiling | High | Reflective layers in heat, high R in cold | Vapor control in cold climates |
| Floors | Medium | Target cold-floor spots, rigid foam under decking | Trailer frames need thermal breaks |
| Penetrations/Frames | Critical | Air sealing, targeted spray foam | Sequence: seal, bridge, then fill |
For a practical checklist and product guidance on tiny house insulation, consult this tiny house insulation guide to match materials to climate and mobility needs.
Top Budget Picks At A Glance For Tiny House Builders
Small-footprint homes get the biggest gains when builders match material traits to climate and wall depth.

Best For Hot Climates: Reflective Bubble / Radiant Barrier
Reflective bubble radiant barriers reject up to 96% of radiant heat. They stay thin and light, so they fit tight cavities.
When seams are taped, they act as a vapor barrier and cut solar gain under roof decks and behind exterior sheathing.
Best All-Around DIY: Rigid Foam Boards Or Fiberglass Batts
Rigid foam boards (XPS or polyiso) deliver higher R per inch than fiberglass and resist moisture in floors and exterior layers.
Fiberglass batts are quick to install in standard stud bays and keep costs down. Pairing foam boards with batts balances space and budget.
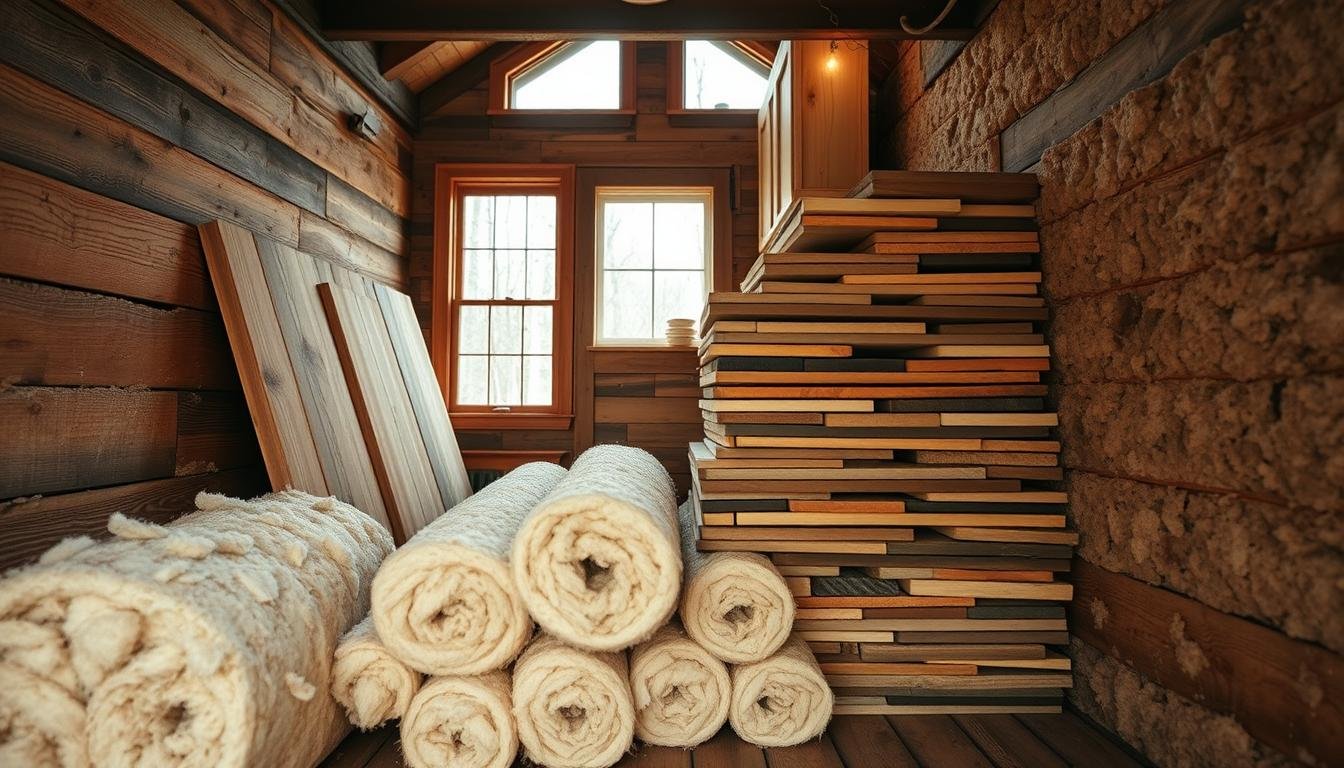
Best Eco Value: Cellulose Or Sheep’s Wool
Cellulose uses recycled paper and can be dense-packed to reduce voids. Moisture detailing is critical for long life.
Sheep’s wool offers R3–R4 per inch, good sound control, and natural breathability. Choose treated wool to meet pest and fire needs.
| Material | Best Use | R-Per-Inch | DIY Ease / Notes |
|---|---|---|---|
| Reflective Bubble / Radiant Barrier | Roofs, warm climates | N/A (reflective) | Thin, easy install; tape seams to act as vapor barrier |
| Rigid Foam Boards | Floors, exterior sheathing | High (XPS / polyiso) | Lightweight, moisture resistant; tape joints for continuity |
| Fiberglass Batts | Standard stud bays | Moderate | Low cost, fast install; needs good air sealing |
| Cellulose / Sheep’s Wool | Eco builds, dense-pack walls | Cellulose moderate / Wool R3–R4 | Lower embodied impact; manage moisture and use treated wool |
Practical tip: Combining a radiant barrier with a foam or fiber layer solves both radiant and conductive heat without thick walls.
For a step-by-step selection process, see the quick start guide that helps match options to climate and build constraints.
Understanding R-Value, Space Constraints, And Climate Zones
Choosing the right R-value and layer strategy makes the biggest difference in a compact build’s comfort and energy use. Designers should match R-targets to local climate and available wall depth before picking materials.
DOE guidance sets a high bar for roofs and attics (often R49–R60), recommends combined cavity plus continuous insulation for walls (roughly R13–R20 plus exterior CI in many zones), and suggests floors range from R13 up to R38+ in cold areas.
DOE-Recommended Ranges For Roofs, Walls, And Floors
Use the highest R where heat crosses most—usually the roof—then add wall and floor protection as budget allows.
| Assembly | Typical DOE Range | Why It Matters |
|---|---|---|
| Roof / Attic | R49–R60 | Controls major heat gain/loss across the house |
| Walls | R13–R20 + CI | Combines cavity and continuous layers to limit thermal bridging |
| Floors | R13–R38+ | Stops cold-foot problems, especially over trailers |
Balancing R-Value Per Inch With Limited Wall Depth
When stud bays are shallow, R-per-inch is a priority. Closed-cell spray foam (~R5.6–R8 per inch) and rigid foam board (~R4–R6 per inch) let builders hit targets without thickening walls.
- Workmanship beats raw R: Good air sealing often outperforms a thicker, leaky assembly.
- Mix modes: Pair a radiant layer with high R-per-inch materials to handle both radiant and conductive heat.
- Trailer floors: Seal seams of foam board under subfloor to cut thermal leaks where depth is limited.
“Read product R-values per inch and test-fit thicknesses against framing to ensure the system fits the build.”
Reflective Bubble Insulation And Radiant Barriers For Tiny Homes
Reflective bubble layers cut radiant heat at the skin of a tiny house without eating into limited wall depth. They work by reflecting most incident energy, so a thin layer improves summer comfort and helps hold warmth in winter. The material is light, durable, and easy to handle on ladders or inside tight assemblies.
How Reflective Foil Works: Reflects Up To 96% Radiant Heat
Reflective foil sends up to 96% of radiant heat back toward its source. That reduces heat gain through a roof and lowers radiant losses in cold weather. Paired with a cavity fill, it balances radiant and conductive modes of heat transfer.
Where It Shines: Roofs, Walls, And Warm-To-Mixed Climates
Best placements include under metal or shingle roof decks, behind exterior cladding, and in van or trailer-style roofs where headroom is tight. In warm-to-mixed climates, the layer cuts cooling loads without adding bulk.

DIY Tips: Taped Seams As Vapor Barrier And Minimal Tools
Installation is straightforward: cut with a utility knife or scissors, staple to framing, and seal laps with compatible tape. When seams are taped, the layer doubles as a vapor barrier and helps control moisture and condensation in tight spaces.
| Use | Advantage | Tools |
|---|---|---|
| Roof Deck | Reduces solar heat gain | Knife, staple gun, tape |
| Behind Walls | Thin radiant control where depth is limited | Cutting tool, tape |
| Paired System | Combine with foam or fiber fills for full coverage | Staple gun, sealant |
Fiberglass, Cellulose, And Rockwool: Classic Low-Cost Fill Options
When framing space is tight, fiber-based fills offer flexible, accessible choices that suit most tiny house builds.
Fiberglass Batts: Cheapest, Easy To Install, Lower Moisture Resistance
Fiberglass batts are widely available and quick to fit into stud bays. They work well on a tight schedule and are the lowest upfront cost option.
Because fiberglass is air-permeable, it must be paired with good air barriers and careful sealing. Otherwise convective loss and cold spots can occur.

Cellulose: Recycled, Dense-Pack Potential, Watch For Moisture
Cellulose uses recycled content and performs better when blown or dense-packed; expect roughly R2–R3.5 per inch in real installs.
Protect assemblies from bulk water and allow drying paths so the fill holds its R-value and avoids mold.
Rockwool: Fire Resistant, Water Shedding, Solid Sound Control
Mineral wool or rockwool yields about R‑3.2 to R‑4.1 per inch. It resists fire, sheds water, and adds useful sound control for a small house near roads or neighbors.
“Match cavity depth, seal around outlets, and avoid compressing batts to get rated performance.”
- Confirm cavity depth and integrate an air control layer.
- Mix fibers with selective foam or a radiant layer to optimize thickness and cost.
- Use gloves, mask, and eye protection when handling fiberglass.
Rigid Foam Boards: High R-Per-Inch And DIY-Friendly Panels
Rigid foam panels pack strong thermal value into thin layers, making them ideal where stud depth is limited and every inch of living space counts.
Extruded polystyrene (XPS) and polyisocyanurate are common materials that yield about R4–R6 per inch. They resist moisture, stay lightweight, and work well under trailer floors or as exterior continuous sheathing to cut thermal bridging.

Best Uses: Floors, Exterior Sheathing, And Trailer Builds
Under trailers, rigid panels stop cold air from stealing heat through the subfloor. As exterior sheathing, a continuous layer of foam raises whole-wall R and reduces stud-to-stud heat flow.
Builders often pair these boards with a thin radiant layer or interior finishes to balance radiant and conductive control.
Cutting, Sealing, And Reducing Thermal Bridging
Measure and test-fit panels before final attachment. Use a sharp knife or an insulation saw to trim tight corners and avoid gaps that reduce performance.
Key detailing: tape seams, seal perimeters, and foaming gaps at transitions. A thin bead of spray foam can close awkward corners where boards are hard to fit.
- Confirm compressive strength and compatibility with adhesives and tapes.
- Stagger joints and protect exposed edges with flashing around openings.
- For product selection, consult rigid insulation options at rigid insulation options and a practical DIY insulated walls guide.
| Use | Common Material | R per Inch | Notes |
|---|---|---|---|
| Under Floors | XPS | R4–R5 | Good compressive strength; moisture resistant |
| Exterior Sheathing | Polyiso | R4.5–R6 | High R, tape seams to create continuous air layer |
| Rim Joists / Corners | Cut Panels + Spray Foam | Variable | Use spray foam to seal gaps at transitions |
Targeted Spray Foam On A Budget
Using spray foam only in high-leverage spots keeps budgets low while boosting airtightness. A selective strategy focuses on performance where small volumes deliver big returns on comfort and energy savings.
Closed-Cell Vs. Open-Cell: R-Values, Moisture, And Structural Benefits
Closed-cell spray foam offers about R5.6–R8 per inch. It adds rigidity and resists moisture, and it can act as a partial vapor retarder in thin assemblies.
Open-cell foam yields roughly R3.6 per inch. It excels at filling gaps and dampening sound, and it stays more vapor-open so assemblies must be designed to dry.
Where To Use Selectively: Rim Joists, Gaps, And Condensation Hotspots
Targeted spots include rim joists, metal-to-wood transitions, skylight wells, and around plumbing or wiring penetrations. Small kit applications at these locations cut leakage and raise surface temperature where condensation forms.
- Closed-cell is ideal in thin, flexible areas or trailer frames that need stiffness.
- Open-cell works where drying potential and sound control matter more than high R per inch.
- Combine spray foam with batts or rigid boards to maximize R per dollar and per inch.

For DIY cost context and safety tips on small-area kits, see a practical take on whether to DIY spray foam at DIY spray foam costs. For sealing guidance and blower-door gains from spot foam, consult the air-sealing guide at how to seal air leaks.
Installation Strategy: Seal Air, Reduce Thermal Bridging, Then Insulate
A clear installation plan saves time and makes every layer of a tiny house perform as intended. Treat the envelope as a system: fix leaks, block bridges, then add thermal layers. This order protects material performance and prevents common failures.
Air Sealing Windows, Doors, And Penetrations Before Adding Material
Start by closing uncontrolled pathways. Use caulk, gaskets, and a bead of foam at window and door frames, top and bottom plates, and around plumbing and electrical penetrations.
Air control done first raises surface temperatures and reduces moisture risk. Check work with a smoke pen or a quick thermal scan before covering assemblies.
Layering And Finishing: Walls, Roof, Floors For A Tight Envelope
Treat thermal bridges by isolating metal studs and trailer members with continuous foam or thin thermal breaks. Sequence matters: finish bridging fixes before you place cavity fills so the insulation meets its rated performance.
Pair a reflective layer at the roof with cavity fill and rigid boards where depth is tight. Use selective spray foam at rim joists and awkward joints to seal geometry that panels can’t reach.
- Complete air sealing, then add continuous thermal breaks where metal bypasses the cavity.
- Layer thoughtfully—radiant, rigid, and cavity fills each control different heat paths.
- Tape, foam, and gasket seams so the air control layer stays continuous across walls, roof, and floor.
- Install interior finishes promptly and verify with a smoke pen or thermal camera for missed leaks.
- Protect openings with proper flashing so bulk water does not damage the sealed envelope.
Result: A disciplined installation delivers a tight, durable building that feels comfortable and saves energy in real-world use.
Cost And Value: Budgeting For Materials, Tools, And Energy Savings
A clear budget helps builders choose materials that pay back in lower energy bills.
Plan by comparing installed cost per square foot, tool needs, and the value of DIY labor. Small houses amplify waste: an extra box of panels or unused cans of foam can sway a final tally.
Expected DIY Price Ranges By Material
Typical installed costs vary: fiberglass runs about $0.30–$1.30/ft², rockwool $1.00–$2.50/ft², and rigid foam roughly $0.25–$0.75/ft².
Spray foam is priced per board foot: closed-cell ≈ $0.90–$1.00 and open-cell ≈ $0.30–$0.50. Using spray foam selectively controls cost while boosting air sealing.
When A Thin Radiant Layer Saves Space And Utility Bills
A reflective bubble layer is thin and light. It reduces solar gain and can lower cooling loads without eating wall depth.
“Properly paired layers—radiant plus a high R-per-inch material—deliver the best results in tight assemblies.”
- Budget planning should weigh per-square-foot cost, tools, and long-term savings on energy bills.
- Fiberglass and rigid foam are the lowest-cost DIY routes and need only basic tools: knife, staple gun, and seam tape.
- Rockwool costs more but adds fire resistance and sound control that matter in small sleeping areas.
| Material | Typical Installed Cost | Key Tools | Notes |
|---|---|---|---|
| Fiberglass Batts | $0.30–$1.30 / ft² | Knife, staples, caulk | Low upfront cost; needs good air sealing |
| Rigid Foam | $0.25–$0.75 / ft² | Knife, tape, adhesive | High R-per-inch; tape seams for continuity |
| Spray Foam (Selective) | Closed $0.90–$1.00 / bd ft | Protective gear, small kit | Use in rim joists and gaps to maximize value |
Bottom line: Factor material behavior, tool costs, and the DOE note that good installation can trim heating bills by ~30%. In a small house, lifecycle value and moisture resilience often beat tiny savings on initial purchase.
Conclusion
Smart sequencing and the right mix of materials deliver big comfort gains in very small footprints.
Start with air sealing, then stop thermal bridging, and finish with a balanced system: a thin radiant barrier, targeted spray foam or closed-cell patches, rigid foam boards, and affordable cavity fills.
Reflective bubble layers can reflect up to 96% of radiant heat and act as a taped vapor layer. Closed-cell foam adds R5.6–R8 per inch and moisture control. Rigid boards give R4–R6 per inch and cut bridging. Fiberglass, cellulose, and rockwool remain useful when detailed correctly.
With careful detailing around openings and climate-appropriate choices, a tiny house can reach lasting comfort and real energy savings without overspending.
FAQ
What are the most budget-friendly options to insulate a tiny house?
The most cost-effective choices include reflective bubble radiant barriers, fiberglass batts, cellulose loose-fill, rigid foam boards, and targeted spray foam. Each option balances price, ease of install, and performance differently. Reflective barriers work well in hot climates, fiberglass batts are simple to fit into studs, cellulose offers recycled content and good fill, rigid foam gives high R-value per inch, and small amounts of spray foam seal gaps and add moisture resistance.
How does R-value matter in a compact build with thin walls?
R-value per inch becomes crucial when wall depth is limited. High-R materials like polyiso or extruded polystyrene (XPS) board deliver more thermal resistance in narrow cavities. The Department of Energy recommends varying R-values by roof, wall, and floor depending on climate zone; tiny builds often prioritize higher R per inch in walls and roofs while using air sealing to boost overall performance.
Is reflective bubble foil effective for both walls and roofs?
Reflective bubble or radiant barriers perform best in warm-to-mixed climates where reducing radiant heat gain matters. They can be used on roofs and interior walls, and they reflect up to about 90–96% of radiant heat when installed with an air gap. They are thin and save space but rely on proper installation and sealed seams to act as a vapor control layer.
Can fiberglass batts cause moisture or mold problems in a tiny build?
Fiberglass itself does not support mold, but trapped moisture in wall cavities can lead to mold on surrounding materials. Proper air sealing, a vapor retarder appropriate for the climate, and ensuring cavities stay dry are key. In humid climates, consider alternatives like closed-cell foam or well-vented assemblies that manage moisture better.
When should builders choose cellulose or sheep’s wool over fiberglass?
Cellulose or sheep’s wool suits builders prioritizing eco value and dense-pack performance. Cellulose provides good air leakage reduction when dense-packed and uses recycled paper. Sheep’s wool is breathable and regulates humidity. Both can be better choices than fiberglass where moisture buffering and sustainability matter, though they may cost slightly more.
Is rigid foam board worth the extra cost in tiny trailers and floors?
Yes. Rigid panels like polyiso, XPS, or expanded polystyrene (EPS) offer high R-value per inch and resist compression, making them ideal for floors, exterior sheathing, and trailer builds where depth is limited. Proper sealing of seams reduces thermal bridging and improves overall efficiency, often paying back through lower energy use.
What is the best use for spray foam in a budget-conscious project?
Targeted use of spray foam—rim joists, gaps around windows and doors, and condensation hotspots—delivers big gains for a modest outlay. Closed-cell foam adds R-value and moisture control, while open-cell foam is cheaper and good for sound absorption. Using small, strategic doses minimizes cost while improving airtightness and performance.
How important is air sealing compared to adding more material?
Air sealing is the first priority. Sealing penetrations, windows, doors, and transitions reduces convective heat loss and moisture movement more effectively than simply increasing thickness. After sealing, layer insulation and address thermal bridging to create a tight, efficient envelope with less material needed overall.
Are there DIY tools or techniques that cut costs without sacrificing performance?
Simple strategies include using tape and canned foam for seams, cutting rigid board with a utility knife, installing batts carefully to avoid compression, and dense-packing cellulose with a rental blower. Proper sealing of seams and joints, and using flashing and vapor control where needed, yields professional results on a DIY budget.
How should material choice change by climate zone?
In cold climates, prioritize higher R-values and moisture control—closed-cell foam or thicker rigid board plus a proper vapor barrier often works best. Warm climates benefit from reflective layers and ventilation strategies. Mixed climates require balanced assemblies that manage both heat flow and seasonal moisture. Consult DOE R-value guidance for specific targets by zone.
What are typical DIY price ranges by material?
Prices vary, but generally fiberglass batts are the least expensive per square foot, followed by reflective bubble, cellulose (installed or rented blower), and rigid foam boards. Spray foam is the costliest per inch; selective application lowers total cost. Local labor and tool rental can change ranges significantly.
Can combining materials give better results than one option alone?
Yes. Hybrid assemblies—rigid foam on the exterior to raise effective R-value and reduce thermal bridging, plus fiberglas or cellulose inside—combine benefits of high R-per-inch and economical fill. Adding a thin radiant barrier can improve performance in hot climates. Layering should address air sealing and vapor control to avoid moisture traps.
What moisture control and mold-prevention steps should builders take?
Ensure continuous drainage planes, proper ventilation, and controlled vapor retarder placement for the climate. Use moisture-resistant sheathing where needed, seal leaks, and avoid trapping wet materials. Materials like closed-cell foam and rockwool offer added resistance to moisture and can help protect against mold when installed correctly.
Are there eco-friendly, low-cost insulation alternatives suitable for a tiny project?
Yes. Cellulose (recycled paper) and sheep’s wool are eco-friendly options. Reclaimed rigid foam or using reclaimed denim/fiberglass can also reduce embodied carbon and cost if sourced responsibly. Balance sustainability with moisture and fire-safety considerations when choosing materials.
🔗 Related Articles in the Zero-Energy Build Cluster
- How to Seal Air Leaks in a Tiny House
- Energy-Efficient Tiny House Layout
- Constructing Energy-Efficient Roofing
- Non-Toxic Insulation Options for Tiny Homes
Sources:
The Tiny LifeThe Tiny Life – Tiny House Insulation Guide
sprayman.coSprayman – Tiny House Insulation Guide 2025
Journeyman HQJourneyman HQ – 9 Insulation Options for Tiny Homes
oneclickdiy.comOneClickDIY – Tiny House Insulation Guide
habitatista.comHabitatista – 7 Best Insulation Options for Your Tiny Home