Do you want to learn how to wire a tiny house for solar? Many compact homes rely on just 30 amps—an RV‑standard service—yet owners often attempt major electrical work without a licensed professional. Knowing the right steps and safety measures can make all the difference in building a reliable off‑grid system.
This introduction gives a clear, practical view of planning an off-grid or grid-tied PV system for a small dwelling. It is for educational purposes only. Readers should hire a licensed electrician and follow the National Electrical Code and code guides.
The text previews key topics: assessing loads, choosing system voltage, combining panels, batteries, and an inverter, and safe breaker-panel distribution. Grounding and bonding are highlighted as critical for shock, surge, and lightning protection.
Safety note: wrong wire sizing, poor terminations, or missing overcurrent protection can cause fires or gear loss. For a concise practical primer, consult this guide at essential tiny house electrical tips.
Key Takeaways
- Start with an energy audit and plan service level; 30 amps is common.
- Follow NEC rules and hire a licensed electrician for installations.
- PV arrays, charge controllers, batteries, and inverters must match needs.
- Proper grounding and overcurrent protection are essential for safety.
- Off-grid and grid-tied paths use different inlet and panel arrangements.
Assess Energy Usage And Size The Solar System For Your Tiny House
Sizing a system starts with tallying device demand and expected run hours. Begin by listing every appliance and device, copying nameplate watts, and estimating hours per day. Note duty cycles — refrigerators cycle, pumps run intermittently, and heaters draw steady power.
Audit Appliances And Devices: Watts, Hours Per Day, And Duty Cycles
They should inventory loads and mark which items are critical. Group lights, charging, and cooking separately. Include water pumps and heaters as special loads that spike demand.
Convert To Watts, Kilowatts, And Kilowatt-Hours Per Day
Multiply each device watts by its run hours, then sum for daily kWh. For example, a 4,195 watts total at 240 volt equals about 17.48 amps (watts ÷ volts = amps). Many efficient homes target 3–7 kWh per day.
“Realistic load counts prevent undersized arrays and frustrated owners.”
Select System Voltage (12V, 24V, 48V DC) Based On Loads And Distance
Higher voltage cuts current and voltage drop on long runs. For large inductive appliances or long wiring runs, choose 24V or 48V and pair with a matching controller and inverter.
Translate daily kWh into array targets using local sun hours. For planning references and component guides, see solar power for tiny houses and a practical DIY overview at DIY solar panel installation.
| Voltage | Typical Use | Advantage | Conductor Size Impact |
|---|---|---|---|
| 12V | Small kits, short runs | Simple, common parts | Larger wires for same power |
| 24V | Medium loads, moderate runs | Lower current, more efficient | Smaller conductors vs 12V |
| 48V | High loads, long runs | Best for efficiency and long distance | Smallest conductor size needed |
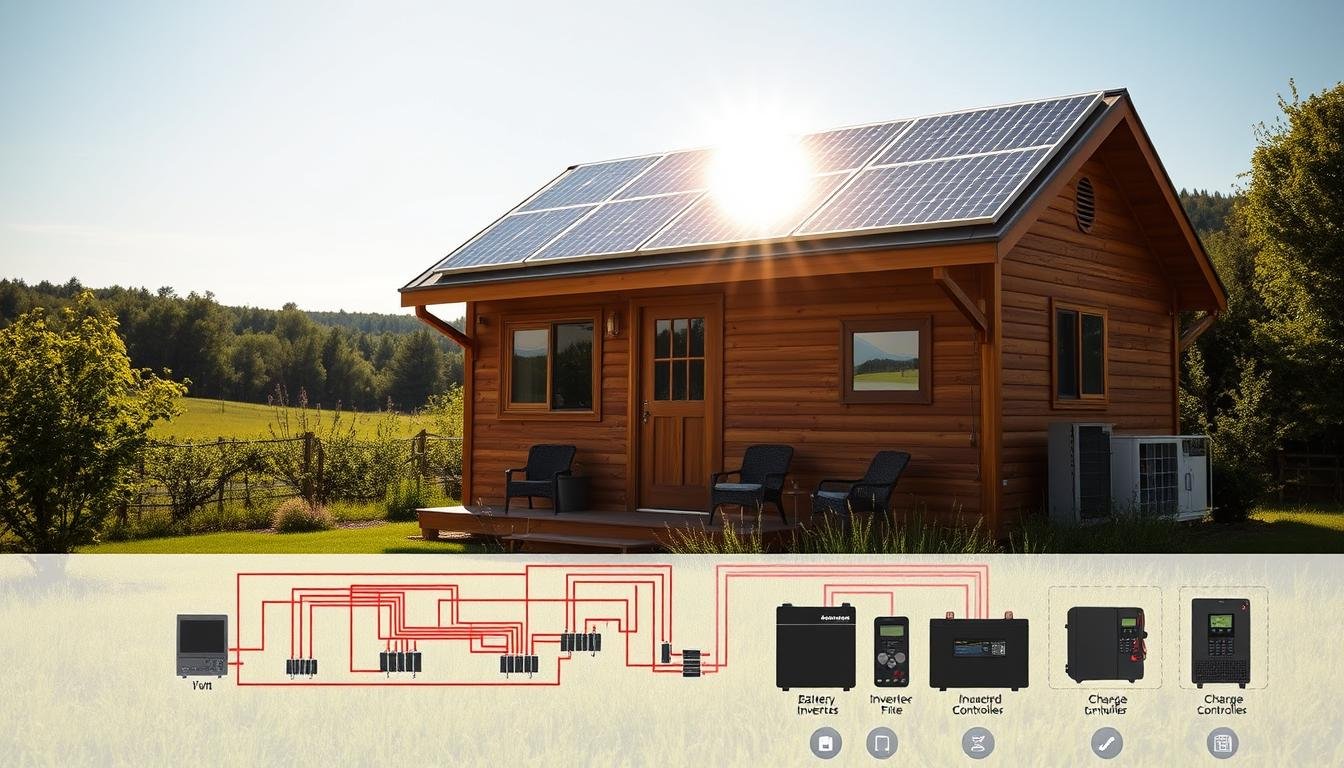
Solar Power Components And How They Work Together
A compact system combines panels, wiring, storage, and inverters into one coordinated energy stack.
Solar panels convert sunlight into DC. A charge controller manages charge profiles and prevents overcharge. Batteries store energy for night and cloud. An inverter creates household AC and a breaker box splits circuits safely.
Solar Panels And Mounting Options
Choose roof, ground, or pole mounts. Aim tilt near site latitude for balanced year-round output. Use stainless lag bolts into rafters or blocking to resist wind uplift. Ground module frames at each grounding point for safety.
Charge Controller Types, Setpoints, And DC Wiring
MPPT outperforms PWM on varied inputs and long runs. Match setpoints to battery chemistry; AGM/GEL need lower float voltages. Use DC-rated protection and copper conductors. Square D QO breakers work up to 48V DC.
Batteries And Storage: Chemistry, Capacity, And Placement
Compare flooded, AGM, GEL, and LFP by cycle life, maintenance, and venting. Place banks in temperature-stable, ventilated enclosures. LFP saves weight and lasts longest for limited space.
Inverter, Breaker Box, And Distribution For AC And DC Loads
Select an inverter by continuous and surge ratings; prefer pure sine for sensitive devices. Use a dedicated DC subpanel for low-voltage circuits and a labeled AC breaker box for living loads.
| Component | Role | Key Note |
|---|---|---|
| PV Panels | Generate DC power | Mount tilt ≈ latitude; frame grounding |
| Charge Controller | Manage battery charging | MPPT preferred; match battery chemistry |
| Batteries | Store energy | LFP best life; flooded needs venting |
| Inverter & Breaker Box | Convert and distribute AC | Pure sine for sensitive devices; use DC-rated breakers |
For practical wiring guidance and panel kit options, see tiny house electrical tips and best solar panel kits for tiny homes.
Electrical Layouts: AC And DC Circuits In A Tiny Home
Tiny house electrical planning begins with clear layout choices. An efficient tiny house layout balances an inverter, an inlet, and short DC runs for critical systems.

When To Use AC Vs DC, Subpanels, And RV-Style Inlets
AC circuits handle general outlets, refrigerators, and most plug-in devices. They branch from the main breaker panel and use standard breakers sized for each circuit.
DC circuits suit low-voltage lighting, pumps, and devices that run efficiently on battery voltage. Keep DC runs short, use heavier gauge conductors, and protect each run with DC-rated breakers or fuses to limit voltage drop and heat.
- An external RV-style 30A inlet or a twist-lock 120V input can feed the main panel for shore power or generator input.
- Place the inverter near the battery bank; AC output then feeds the breaker box for living circuits.
- Use a DC subpanel for lighting, communications, and pumps to segregate critical loads for selective backup.
- Choose inlets and cords sized for expected load to avoid excessive voltage drop when the unit moves.
- Label circuits and breakers clearly so mixed-voltage systems are safe and easy to service.
- Integrate grid or generator input with proper transfer equipment to isolate sources and protect the panel and inverter.
For a practical layout diagram and further details on safe panel selection, see this system overview.
Wiring, Breakers, And Grounding For Safety And Performance
wiring choices set the margin between a reliable system and an unsafe installation. Proper conductor selection, overcurrent devices, and grounding practices reduce loss, heat, and shock risk.

Wire Gauge, Voltage Drop, And Distance Considerations
Use copper conductors and upsize gauge beyond NEC minimums for long DC runs. Higher current at 12V or 24V greatly increases voltage drop; larger wires preserve power and run efficiency.
Calculate one-way distance and acceptable percent drop, then choose a conductor that keeps drop below 3% for critical circuits.
Breakers, Fuses, And Low-Voltage DC Protection
Place overcurrent protection on every branch circuit. Install fuses between the array and the charge controller and again between the controller and the battery bank.
Use Square D “QO” breakers where DC ratings apply. Avoid automotive fuses and non-rated devices in residential wiring.
Grounding, Bonding, And Lightning Protection Best Practices
Bond module frames and equipment grounds to a common bus. Run bare copper to an 8-foot ground rod and tie inverter and battery negative as recommended.
Use lightning arrestors near combiners, stainless mounting hardware, and test polarity and continuity with a volt‑ohm meter before final battery connections.
- Use copper and solid terminations; avoid aluminum.
- Protect each conductor with proper breakers or fuses.
- Verify continuity and polarity before energizing batteries.
Installation Steps: From Panels To Batteries To Inverter
Plan array layout, conductor runs, and protection devices before lifting any modules onto the roof or rack.
Roof Vs Ground Mount: Tilt, Orientation, And Wind Uplift
Tilt near site latitude and orient panels to avoid morning fog or late-afternoon shading. Ground mounts allow easier cleaning and adjustable tilt for seasonality.
Roof mounts save space but must resist uplift with stainless lag screws into rafters or blocking. Perform a shading analysis and confirm structural backing before fastening.

Step-By-Step Wiring Sequence And Testing Procedures
- Mount panels and secure frames; group homeruns to a combiner or junction box.
- Install a fused disconnect between the array and the charge controller, and another between the controller and battery bank.
- Decide parallel wiring for 12V banks or series strings for higher-voltage MPPT input to reduce current on long runs.
- Set controller charge profiles for the selected battery chemistry (AGM/GEL/LFP). Configure absorption and float voltages.
- Connect battery interconnects with proper torque, insulated bus bars, and ventilation or thermal management as required.
- Land inverter AC output into the breaker panel with correct grounding and neutral bonding per equipment instructions and code.
- Perform pre-energization checks: measure open-circuit panel voltage, verify polarity with a volt‑ohm meter, and confirm fuses and breakers are rated and labeled.
“Never connect panels directly to batteries without a controller; that risks overcharge and equipment damage.”
| Mount Type | Tilt/Orientation | Structural Notes |
|---|---|---|
| Roof Mount | Fixed near latitude; face unobstructed azimuth | Requires blocking, stainless lag bolts, and wind uplift checks |
| Ground Mount | Adjustable tilt; easy maintenance | Requires concrete or anchored footing and theft protection |
| Pole Mount | Single-axis tracking options; higher yield | Needs reinforced footing and additional wiring length |
Labeling and shutdown procedures simplify maintenance over time. Mark disconnects and breakers clearly and keep a written sequence near the main panel.
How Many Solar Panels And Batteries Do You Need?
solar panels sizing starts with daily kWh targets and local sun‑hour figures.
Many tiny homes use about 3–7 kWh per day. Two 400W panels in 5 sun hours yield roughly 4 kWh per day. That gives a clear baseline for minimalist and moderate loads.

Panel Count Examples Using U.S. Sun Hours
Use this rule of thumb: ~200 watts of array will recharge about 1 kWh of usable battery in a 5‑hour sun day. So a 2 kWh usable battery bank needs roughly 400 watts of panels.
Example: Minimal usage (3 kWh/day) = ~600 watts array. Moderate (5 kWh/day) = ~1,000 watts. Heavy demand (8+ kWh/day) needs larger arrays or grid/generator support.
Battery Storage Sizing For Nighttime And Cloudy Days
Size batteries for usable capacity, not nominal. At 50% usable depth, a 4 kWh usable goal needs an 8 kWh nominal bank.
LFP batteries get highlighted for long cycle life, compact footprint, and safe thermal behavior—good for small spaces and frequent cycling.
Space-Saving Modular Kits And Plug-And-Play Options
Modular kits like EcoFlow Power Kits offer stackable LFP packs, a Power Hub, and app monitoring. These systems save space and simplify installation.
For practical panel counts and kit options see the panel count guide.
“Increase array and storage in winter or plan for load shedding and a generator for resilience.”
| Scenario | Daily kWh | Approx. Array (W) | Suggested Usable Battery (kWh) |
|---|---|---|---|
| Minimal (lights, devices) | 3 | 600 | 2–3 |
| Moderate (fridge, pumps) | 5 | 1,000 | 4–6 |
| High (AC, induction) | 8+ | 1,600+ | 8–12 |
Conclusion
solar power planning begins with honest load counts and ends with matched panels and storage sized for real needs.
Safe wiring demands NEC‑aligned practices, correct grounding, and DC‑rated protection. Professional consultation reduces risk and ensures the system meets code.
Right sizing saves money and improves reliability. Plan for seasonal variation, maintenance access, and future expansion. Include backup paths — grid, generator, or modular kits — so critical circuits stay powered when time and weather challenge the system.
FAQ
What size system is needed based on daily energy use?
Start with an audit listing each appliance, its watt rating and hours of use per day. Multiply watts × hours to get watt-hours, then sum for daily kWh. Add 20–30% for losses and future growth. Divide by average peak sun hours in the local area to estimate required panel wattage. Choose battery capacity that stores at least one full day of usable energy (considering depth of discharge) and a system voltage (12V, 24V, 48V) that minimizes current for the chosen load and run distance.
Which system voltage should be chosen for minimal losses?
Higher nominal voltages reduce current and voltage drop on long runs. For most off-grid homes, 24V is common for modest systems and 48V suits larger loads or longer wire runs. Larger inverters and battery banks often require 48V for efficiency. Match inverter and charge controller ratings to battery bank voltage and ensure wiring and breakers are sized accordingly.
What type of charge controller is best?
MPPT (Maximum Power Point Tracking) controllers deliver the best efficiency, especially when panel Vmp exceeds battery voltage or in cloudy conditions. PWM controllers are cheaper and work for simple, small arrays sized to battery voltage. Verify controller amperage rating exceeds expected array current and that the unit has proper low-voltage disconnect and temperature compensation features.
How many batteries are required for reliable storage?
Battery count depends on usable capacity needs, chemistry, and desired autonomy days. Lithium iron phosphate (LiFePO4) offers higher usable depth of discharge and longer cycle life versus flooded lead-acid, so fewer modules are needed. Calculate total amp-hours required at the system voltage, then select battery modules that meet capacity and space constraints. Plan for proper ventilation, secure mounting, and a battery management system with balancing for lithium banks.
What inverter type is recommended for home appliances?
Pure sine wave inverters are recommended for sensitive electronics, motors, and HVAC devices. Size the inverter for peak simultaneous loads and allow surge capacity for motor starts. Consider inverter-charger combos when integrating generator or shore power for recharging and automatic transfer.
How should AC and DC circuits be laid out inside the dwelling?
Keep DC circuits short and direct from battery bank to inverter and DC loads to minimize losses. Centralize the AC distribution in a breaker box fed by the inverter output, with dedicated circuits for major appliances. Isolate high-current DC loads with fuses or breakers near the battery positive terminal and use subpanels for remote AC clusters. Use clearly labeled conductors and separation between AC and DC wiring where required by code.
What wire gauge is required to limit voltage drop?
Choose wire size based on maximum current and run length to keep voltage drop below 3% for critical circuits. Use tables or calculators for copper conductors; for example, 48V systems allow smaller gauge than equivalent 12V setups. Always derate for temperature and bundling, and use tinned marine-grade or stranded copper for vibration-prone RV or trailer installations.
How are DC circuits protected from shorts and faults?
Install appropriately sized fuses or DC breakers as close to the battery positive as possible on each circuit. Use breakers rated for DC operation and select slow-blow or inverter-specific types for inrush-prone loads. Ensure negatives are commoned where required and protected with proper bus bars and insulated terminals.
What grounding and bonding practices improve safety?
Bond the negative of the battery bank and inverter enclosure to a common earth ground per local code. Separate AC and DC grounding systems where required and use grounding rods or driven electrodes for mobile foundations following NEC or local regulations. Install surge protection devices for inverter input and output and consider lightning arrestors for exposed rooftop arrays.
What is the recommended step-by-step wiring sequence during install?
Typical sequence: mount panels and route PV cables to combiner or charge controller, connect array to controller, connect controller to battery bank (observing polarity and pre-install fuses), connect battery bank to inverter through proper DC disconnect and breaker, then energize inverter and connect AC loads via breaker panel. Test each stage for proper voltages and polarity before moving to the next. Follow manufacturer instructions and use a qualified electrician for final inspection.
How many panels are needed using U.S. peak sun hours?
Divide daily energy need (kWh) by site’s average peak sun hours to find required array kW. For example, a 3 kWh/day load in a 4 sun-hour location needs ~0.75 kW of panels — roughly three 250W modules. Adjust for tilt, shading, and seasonal variations and size the array to meet winter minimums or add battery storage for cloudy periods.
What are compact, modular options for limited roof space?
High-efficiency panels like SunPower or LG reduce footprint, and flexible or microinverter-based systems can fit curved or small roofs. Plug-and-play kits from brands such as Renogy or Goal Zero provide pre-matched components and simplified wiring for small off-grid setups. Combine with LiFePO4 modular batteries for space and weight savings.
When is a generator or hybrid setup recommended?
A generator or hybrid inverter-charger is valuable when daily loads exceed feasible battery or panel sizing, or for occasional high-power appliances like electric water heaters. Use automatic transfer switches and intelligent charging profiles to efficiently top off batteries without overtaxing the generator. Always size the generator to handle inverter surge and charging rates.
What permits and inspections are typically required?
Most jurisdictions require electrical permits and inspections for permanent PV systems. Mobile or trailer-mounted installations may fall under RV codes or local authority having jurisdiction. Provide system drawings, component datasheets, and bonding plans to the inspector. Work with a licensed electrician familiar with NEC 2020 and local amendments to ensure compliance.